

Modifications
When it comes to the RV I seem to have some compulsive tinkering issues. I get an idea in my head and the project itself becomes more important than the end result. Some of the projects shown below may be overkill. Others may be frivolous. It's all fun.
As of 2025 this page represents more than 14 years worth of tinkering. Topics are sort of arranged by category, but are in no particular chronological order. This page is getting long!
Disclaimer
This page is a collection of ideas, NOT a step-by-step instruction guide. Most of the modifications below were done years ago. I don't remember part numbers, suppliers and other details. You should not attempt to replicate any of these mods unless you possess the ingenuity to pull it off on your own.
Exterior Mods
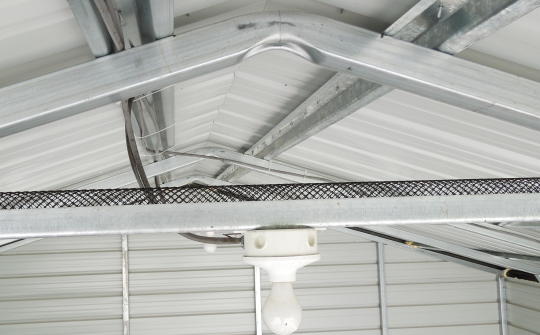
The most significant exterior modification to our new Trail Sport was the addition of a Carolina Carports building. We intend to protect our RV investment this time around.

Carolina Carports building.
Anti-bird tip: If you have an open Carolina Carports building you probably have birds nesting in the soffits. I bought rolls of 6"-wide plastic rain gutter screen. I gently bent the screen lengthwise and stuffed it into all the interior soffit openings. The screen stays put without any fasteners. Best to do this during the winter before the birds take an interest in the carport to begin with.
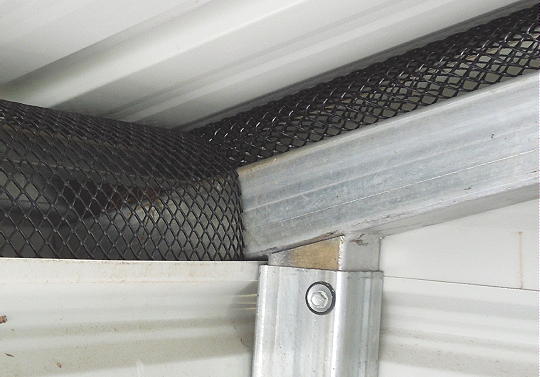
Gutter screen stuffed in the side and end soffits.
Gutter screen stuffed in the horizontal roof members.
Update: The little friggin birds were more tenacious than I anticipated. They pulled out the screen and squirmed around the ends. So I used canned expansion foam to glue and seal the screen sections. After attacking the foam for a few days the birds gave up for good. Update/Rant: I've been chasing these birds around my property for more than a decade now. Every time I block something they nest somewhere else. I've added bird spikes at various locations and found that a scrap of garden hose can make a convincing (to a bird) "snake".
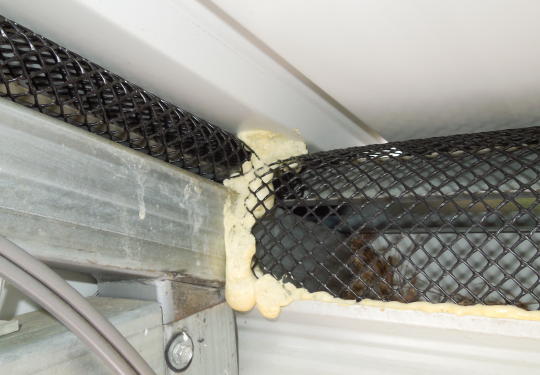
Gutter screen sealed with canned expansion foam.
The building is a big help, but the front of the RV is still exposed to afternoon sun. I decided to proactively get rid of the front decals before the weather turned them into a faded, crinkled mess. I'm not a fan of modern RV graphics. But removing all the decals would make the RV look like a concession trailer. I compromised by only pulling off the decals around the front and front sides plus all the "R-Vision" and "Trail Sport" decals. Nothing against the company, I'm just not into decals. I also removed most of the various warning labels around the trailer. It wasn't a fun job. I worked on it for an hour here and there over the course of a summer. The decals were only about two years old when I pulled them off. But the ones on the front were already becoming brittle. I'm glad I didn't wait any longer. Some shadows were left behind, but I think they'll fade with a few more years of weathering. Update: Years later the shadows have not faded and never will. I'm guessing that the decal adhesive altered the porousness of the gelcoat. It still looks better without decals.
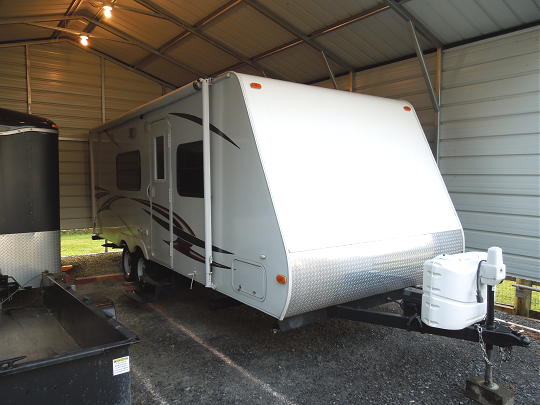
By the end of 2013 I had removed many of the RV's decals including everything up front.
The RV was ordered with two Fan-Tastic 4000R roof vents. I added a pair of MaxxAir II covers so the vents can be left open in all weather.
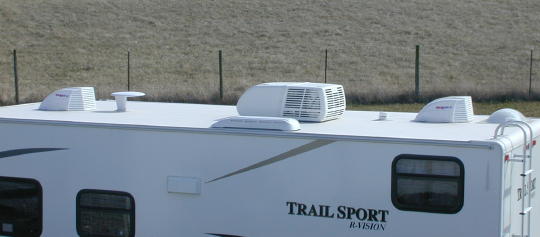
MaxxAir II vent covers.
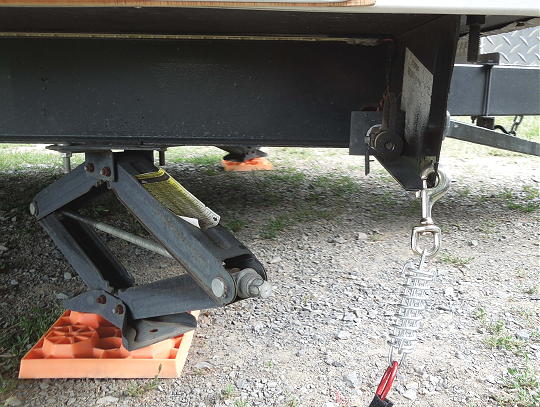
In preparation for adding a bike rack I had the flimsy original bumper replaced with a new full-width tube made from heavier steel. I forget the gauge, but the walls are about 1⁄8" thick. I opted for a Swagman model "XC-2 RV" bike rack which is supposed to be an RV-specific design. The bike rack included a bolt-on 2" hitch receiver for a 4"x4" RV bumper. I scrapped the spare tire carrier to make room for the bicycles. The spare tire is now stowed in the truck. I'm pretty confident that this new bumper isn't going anywhere. I lock a steel cable around the bumper and bikes to hold it all together should something else fail.
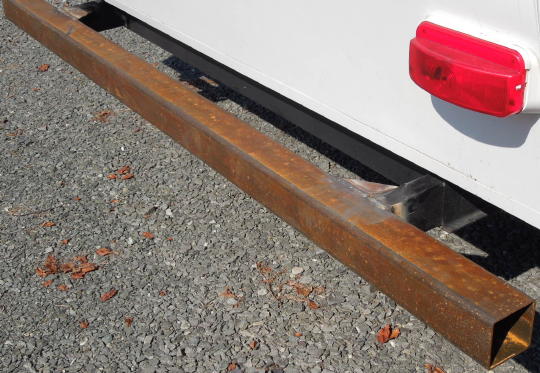
New bumper.
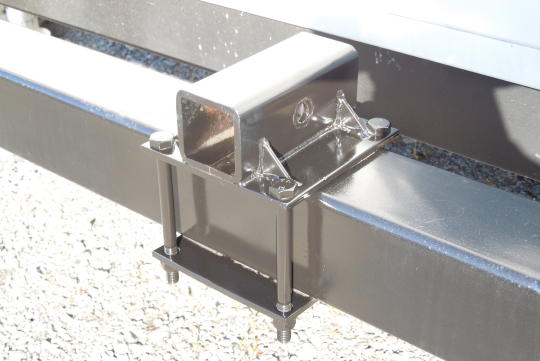
Bolt-on hitch receiver.
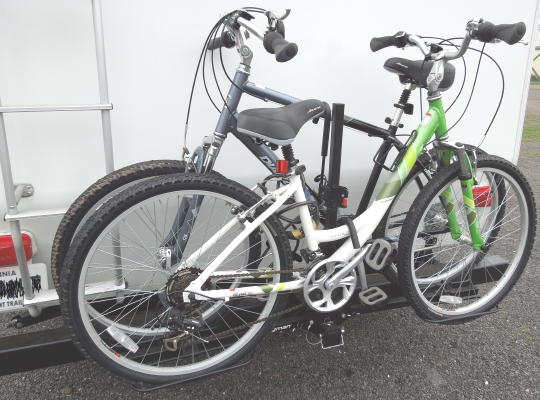
Swagman model "XC-2 RV" bike rack.
I drilled a ½" hole at the edge of the bumper for a dog tie out. I added another ½" hole at the front frame rail.
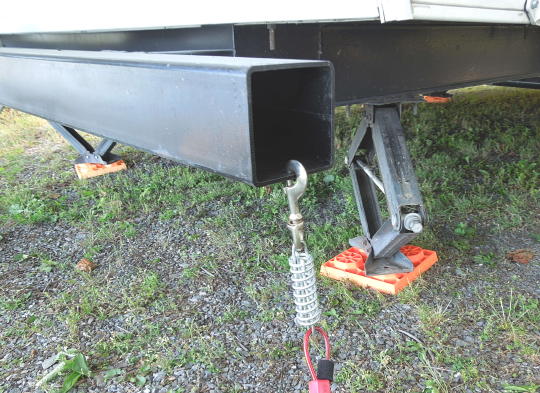
Dog tie out clipped to the rear bumper.
Dog tie out clipped to the front frame rail.
One thing leads to another... The inside dimensions of the new bumper would not accommodate sewer hoses. So I made a new sewer hose carrier from a 4" PVC drain pipe. I cut an 8' section of pipe and mounted it under the trailer frame. Curbside I added a cap with a vent hole in the middle and a drain hole underneath. I oriented the bell end of the pipe streetside. The bell acts like a funnel for stuffing in the sewer hose. It's still a tight fit. I had to trim the grip tabs off the female ends of my sewer hose couplers. Streetside I drilled a hole through the bell end of the pipe as well as a spare hose coupler. As I stow the hose I twist on the spare coupler and then clip it on to the pipe. Finally I covered everything in a coat of black paint. The pipe is more than sufficient to carry my three 10' sections of hose.
Curbside end of the sewer hose carrier.
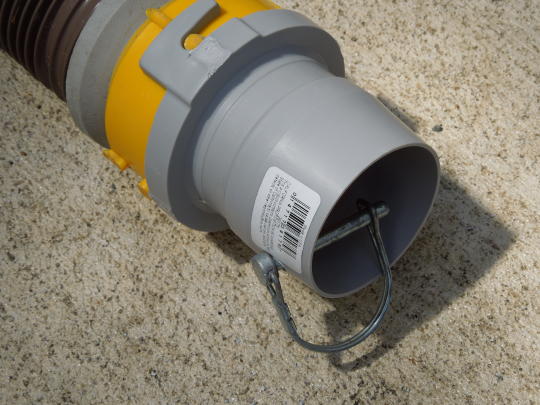
Spare coupler and clip.
Streetside the hose is stowed and the spare coupler is clipped to the bell end of the pipe.
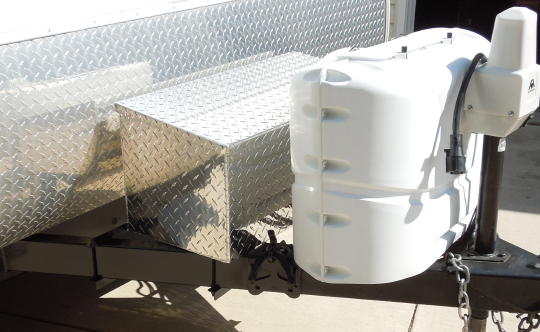
I once forgot to secure the lid on the propane tank cover. Highway winds subsequently unsnapped the hinges and blew it away. After acquiring a new lid, I drilled some holes and added some cable ties. Hopefully the lid will stay with the cover even if it comes loose from the hinges. I used black cable ties because they're supposed to be UV resistant.
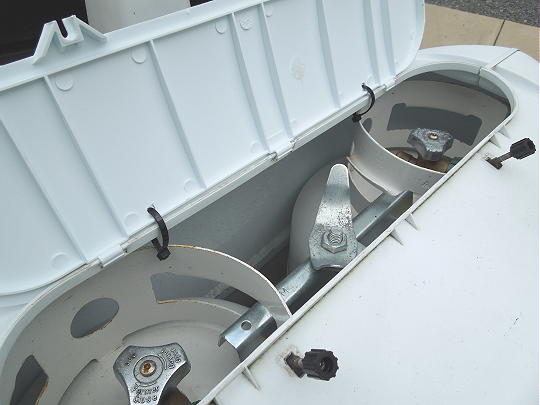
Propane tank cover lid with added cable ties.
Eventually I had to replace the LP automatic changeover valve. I bought a new valve made by Marshall Excelsior. But the new valve had an indicator arrangement that wasn't visible from the tank cover's top lid. So I cut a peep hole in the back. I'm hoping the wasps don't find the hole. The cover has always been open from the bottom and I haven't had any bug problems yet. Update: No bugs, but the damn carport birds found their way under the cover and nest on top of the LP tanks. My only solution is to leave the cover off from spring to mid-summer.
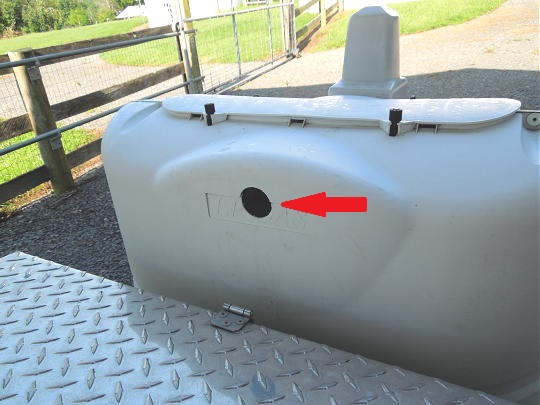
Propane tank cover with peephole.
After a mere two years of use I found the strap around the factory battery box had sun rot. I scrapped the whole thing and bought an aluminum diamond plate toolbox by DeeZee. The box is just the right width to fit between the spring bar lift brackets and the front of the trailer body. Inside the box I installed a Powerhouse battery tray. I deliberately selected a battery tray that did not involve a strap. I like that the battery is exposed such that I can easily check levels without any disassembly. On the back wall of the box I cut two holes for a pair of plastic soffit vents. They're glued in with silicone caulk. For the battery cables I cut another hole and added a rubber grommet. I also drilled two small holes in the bottom of the box for added ventilation and to drain any moisture that may accumulate. The box is clamped to the A-frame by way of eight long bolts and pieces of aluminum angle. A long piece of angle supports the back of the box where it's narrower than the A-frame. Finally, I masked off the box and sprayed black around the bolts and angle. The rest of the box is filled with my collection of Linx Levelers. This move freed up a lot of storage inside the RV. The plastic blocks are lightweight, moisture resistant and won't short the battery. Update: I believe this particular DeeZee toolbox has been discontinued. I have no substitute information.
New battery box.
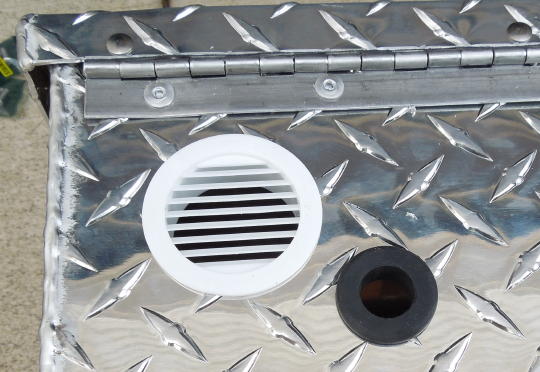
Rear wall of the battery box showing one of two soffit vents and a rubber grommet for the battery cables.
Battery box clamped to the A-frame with long bolts and aluminum angle.
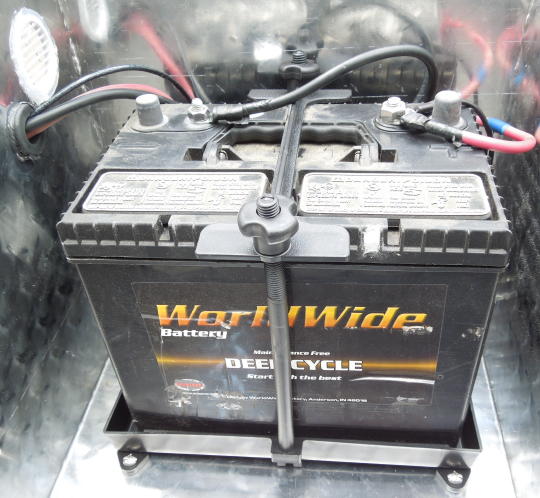
Powerhouse battery tray.
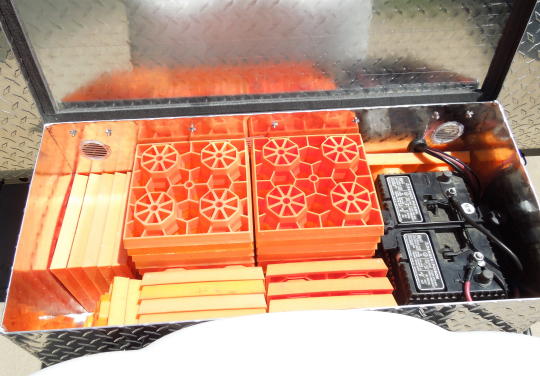
Lynx Levelers fill the rest of the battery box.
I modified one of the Lynx Levelers to not sink into the lawn (one of our favorite RV spots is on lawn). I used plastic material from a cutting board to create a solid base. First I ran the leveler over a table saw to make a series of weep holes in the bottom edges of the webbing. I'm pretty sure there's no adhesive that would effectively bond these plastics. So I screwed them together using a recessed fender washer (made from more cutting board material). I also screwed a small block of material in a pair of opposing corners to prevent the leveler from spinning on the base.
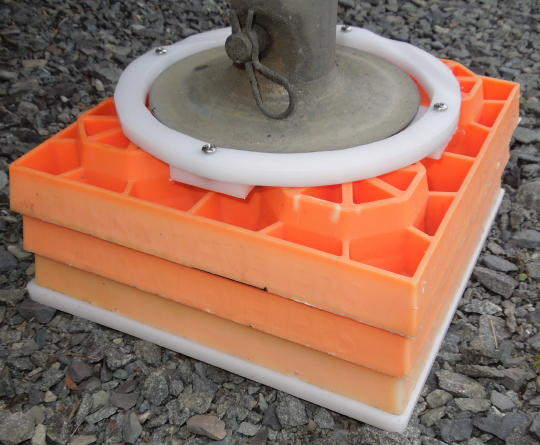
I had some leftover material from the cutting board so I made a two-layer adapter to lock the tongue jack foot to a Lynx Leveler. The bottom layer is an X-shape that fits into the leveler. The top layer is a doughnut-shape that fits around the foot. I don't really have a foot slippage issue. This was more of a craft project that I may or may not end up using.
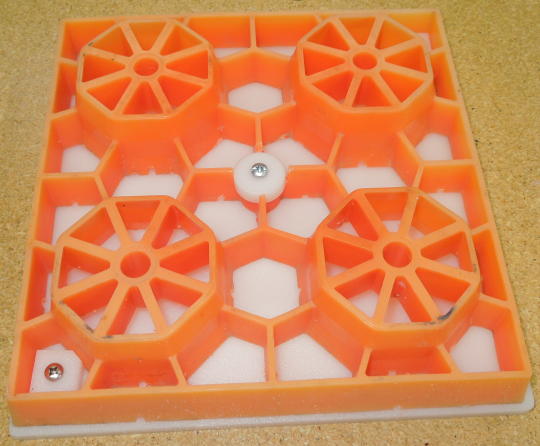
Lynx Leveler with solid base.
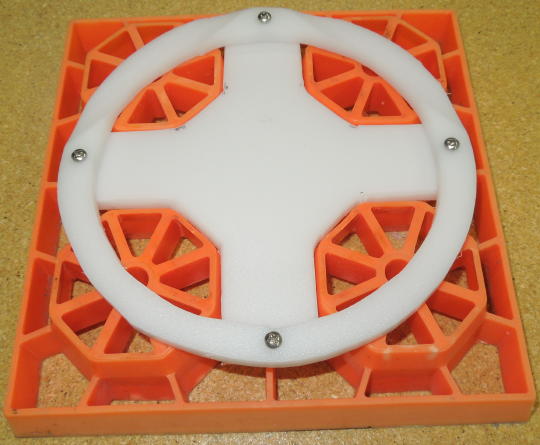
Tongue jack adapter.
Done!
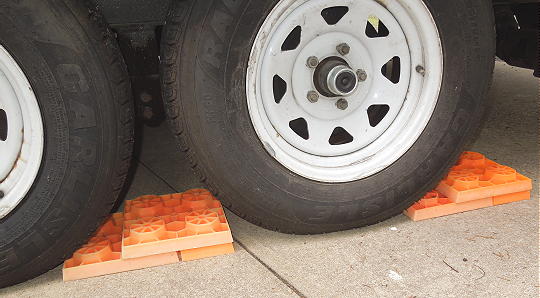
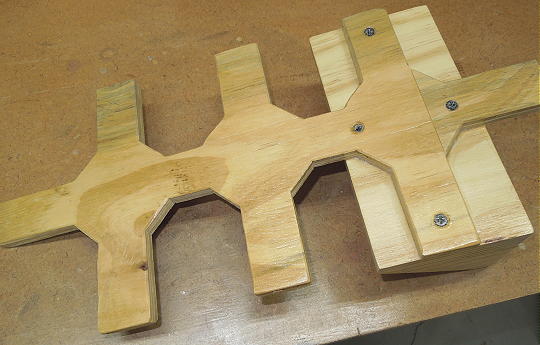
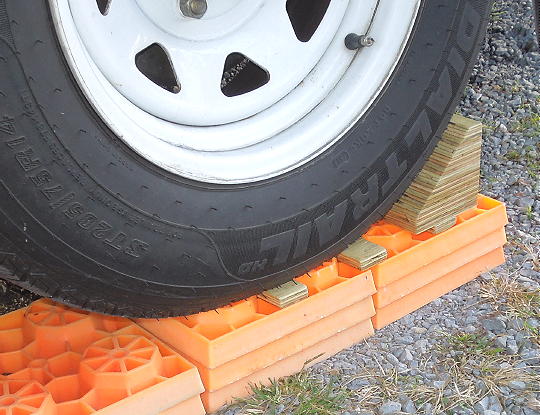
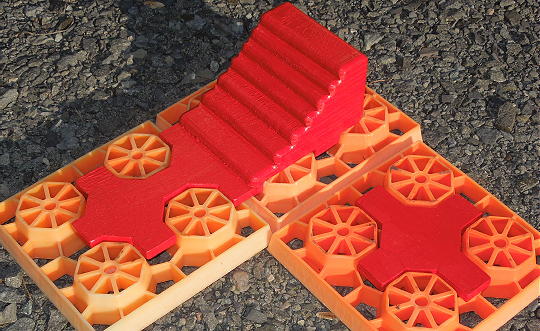
I cut a Leveler in half to make Leveler-saving half-pyramids. One and a half Levelers fit between my wheels. So I can go up two levels without having to build an elongated pyramid spanning both wheels.
Half-Levelers for half-pyramids.
I didn't like the Lynx chock. It was too big for my wheel size and it didn't center the wheel on the preceding Leveler. I made a chock from laminated layers of ½" pressure treated plywood. It's just right for my 14" wheels. And it's captured under the tire so it can't slip. While I was at it I made an "X-pad" for the non-chocked wheel. It probably doesn't matter, but I never liked how the Lynx Levelers deform the tire tread. The X-pad provides more flat surface area for the tread.
Chock bottom.
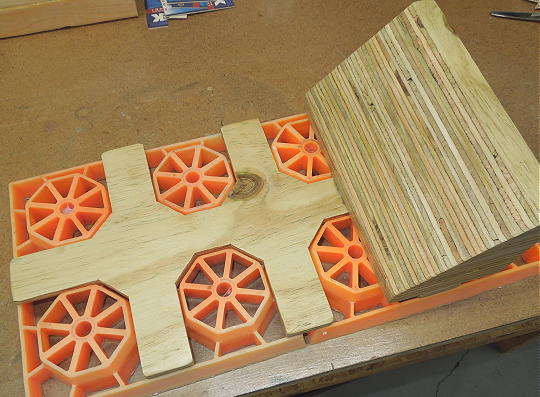
Chock top.

X-pad.
Chock in use.
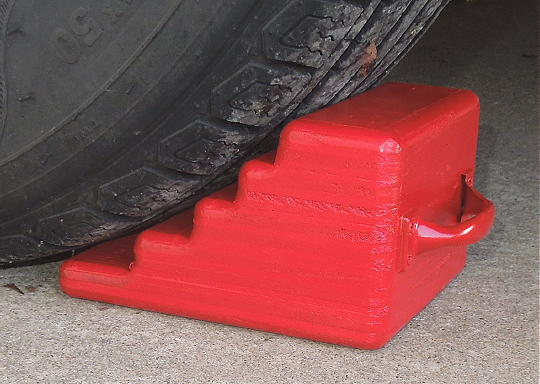
More chocks: I made these by laminating pieces of ¾" pressure treated plywood contoured to the exact outer diameter of my tires. Unlike the too-big store-bought chocks, I don't have to roll back far to get these to "grab".
Homemade chock.
I liked the more compact design of the above red chocks. So I remade my Lynx chocks in a similar manner. I also made smaller X-pads that are less likely to become dislodged and crushed.
New Lynx Leveler chocks.
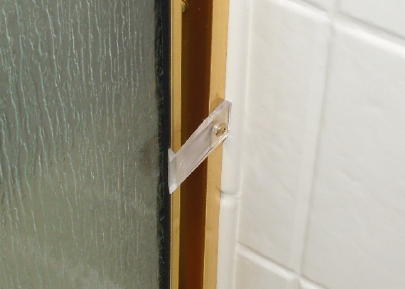
The RV has two emergency exit windows streetside. I made a pair of prop stick extensions from 1" PVC pipe. I bought precut 2' sections that ended up being just the right length. The pipe simply slips over the window's existing push bar handle. On the other end of the pipe I added a 45 degree elbow that I cut down into the shape of a tab. The tab slips into the existing window frame notch. I wouldn't leave this set up in high winds.
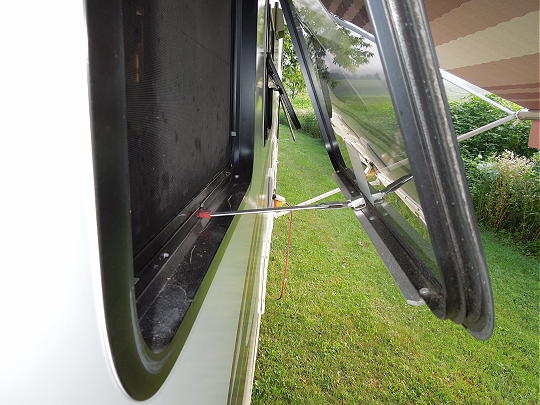
Window narrowly open with only the existing push bar handle.
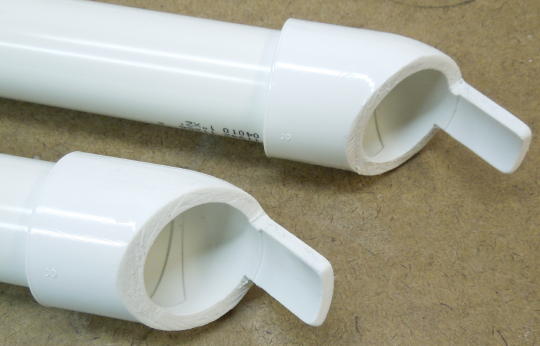
Modified 45 degree elbows.
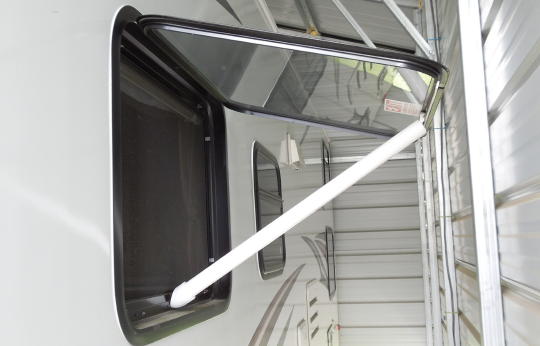
Window open wide for way more air than the existing push bar handle would allow.
I wanted some quiet air circulation around the front sleeping area. This started off as a O2COOL Treva 10" DC fan, which was quiet, light and compact. It was lighter and more compact after I hacked away the base/battery compartment. I drilled some holes, mounted some hooks on the window valance and powered the fan with the included AC adapter.
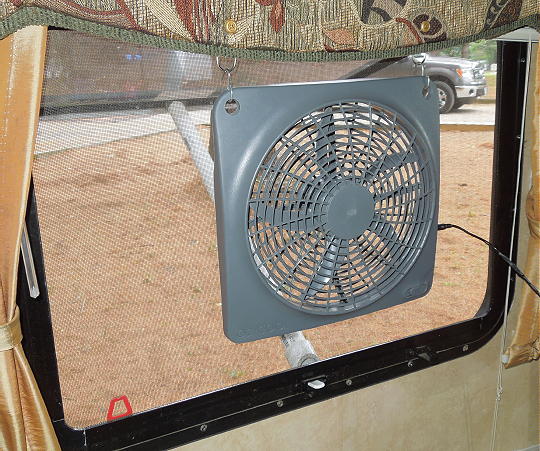
Window fan.
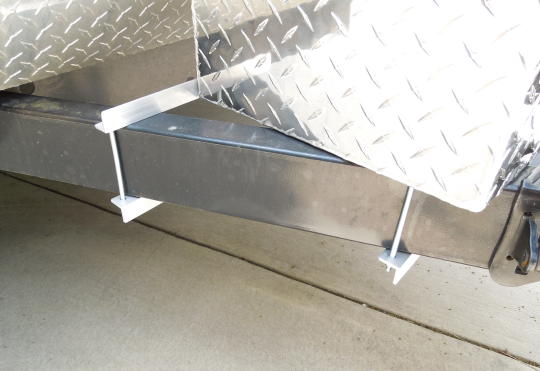
I added a third pair of stabilizer jacks toward the center of the trailer just in front of the wheels. The new jacks dramatically improve the trailer's stability. Having one right by the entry step is especially helpful. I was already using a small cordless drill to deploy the original corner jacks. So the new jacks only add a few more seconds to our setup time.
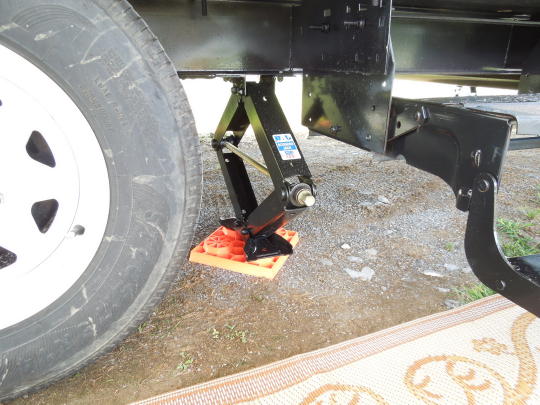
One of two additional stabilizer jacks shown curbside between the wheels and entry steps.
Our cat Scruffy already had inside access to the front pass-through storage compartment where her litter box is kept. I built a portable cat patio that can be hung from the hatch opening. When we're hanging out around the campsite I set up the cat patio. Scruff likes to come out in the sun and see what the humans are up to. The patio started off as a wire basket I found at Home Depot in the closet organizing department.
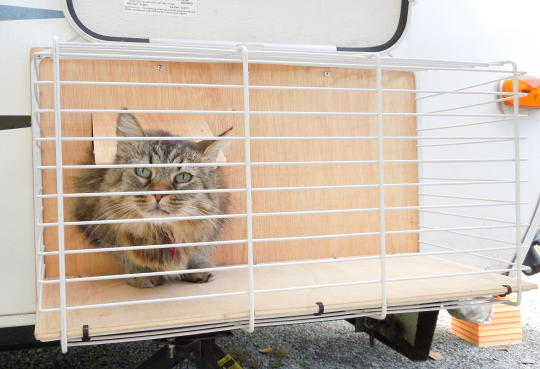
Cat Patio.

Cat Patio.

Cat Patio.
Below is a back shot of the cat patio showing the cleats that fit into the hatch opening. The bottom cleat carries most of the weight. The upper hook-like cleat keeps the patio from tipping out.

Cat Patio.

Smokey the cat.
Instead of walking up the steps like a sane animal, our dog insisted on jumping multiple steps. Then she'd slip and fall. Then she'd be afraid of the steps. I made a ramp from ½" plywood with side and bottom bracing and non-slip tape on top. It rests on the first step and is level with the second step. It's strong enough for a human, but still flexible enough to account for uneven campsites. The point of the ramp was not to have a ramp, but to eliminate all but one of the steps.

Ramp.
Underside of ramp.
Some sort of mud-nest-building critter kept making a mess in the accessory track of the awning roller tube. So I stuck an earplug in each end of the track. An earplug needs to be removed when we set up our Carefree Sunblocker. But the earplugs are disposable and easy to get in and out.
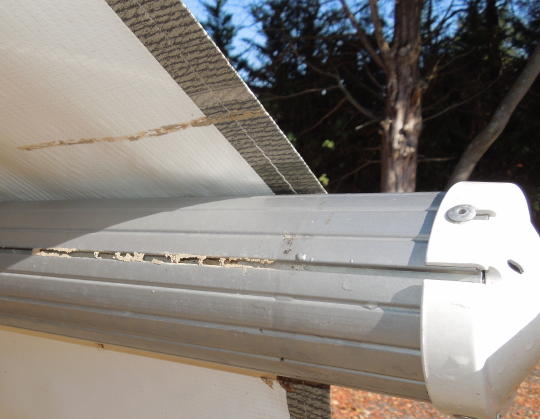
Insect mud mess.
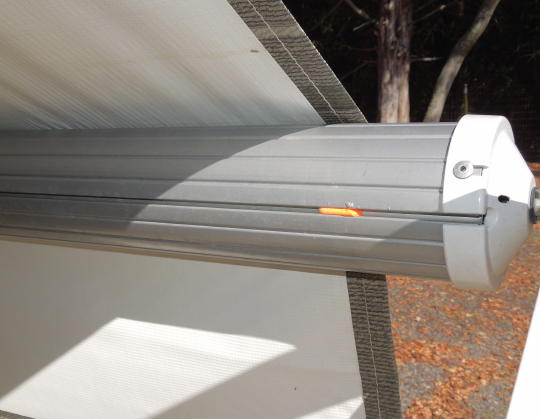
An earplug to keep out the bugs.
For years I've thought about having a streetside awning. I never saw an RV with a streetside awning. There appeared to be no such thing. But I can think of several advantages... 1) Occasionally the view is streetside and it'd be nice to have some shade to sit under. 2) Enhanced privacy. 3) Enhanced sun and heat protection (our fridge and food pantries are steetside). 4) Shade while servicing the streetside hubs and brakes.
I didn't have a fully-formed idea of what I'd eventually do for an awning. But step one was to replace the existing streetside insert drip rail with an insert gutter/awning rail just like what's curbside. The difference between these two materials is pennies to the foot. So it kinda pisses me off that the factory didn't simply use the same material on both sides of the RV to begin with. Some RV manufactures do. Oh well. I bought three 8' sections to do the job. It does come in 16' sections, but shipping expenses were impractical. Since I was initially installing the rail without an awning, I cut an 8" gap in the awning slot at the rear so I could install an awning later. I also added an extra long rain spout at each end of the trailer.
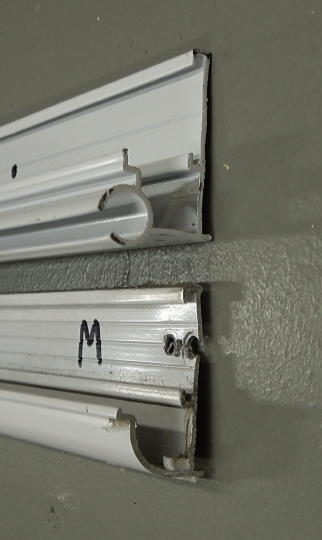
New insert gutter/awning rail (top) compared to the old insert drip rail.
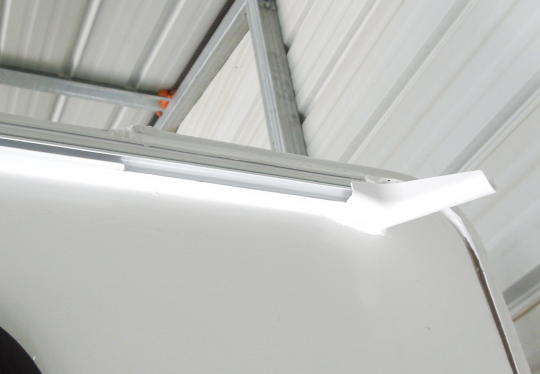
A gap in the awning slot and an extra long end spout.
Shown below is a preliminary experiment using the new awning rail along with our existing Carefree Sunblocker. It was a lot of work to set up requiring two people, a ladder, rope and some stakes.
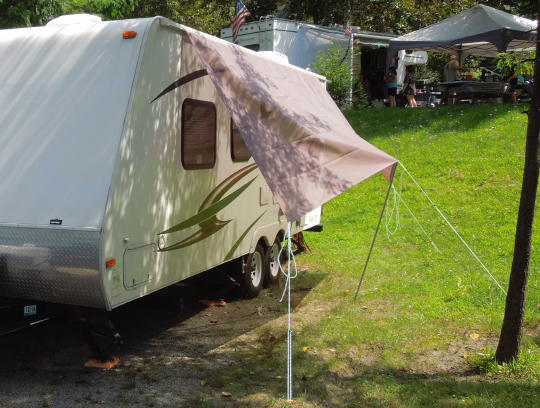
Streetside shade.
Years later... I had a bunch of windows, utilities and other streeside wall obstructions that limited me to a 13' awning. I went with a Carefree Pioneer Lite because it looked to be about the most simplistic and least expensive option. The installation instructions were "okay". The biggest surprise was the bottom brackets. They didn't look like what the instructions showed. The bolt pattern didn't look like it would work without backing blocks, which I knew my wall didn't have. So I ordered a pair of Dometic brackets exactly like those for my existing curbside awning.
This whole project was predicated on the assumption that I wouldn't need backing blocks if I screwed into the bottom edge of the wall where the wall is strengthened by the adjoining floor. You know what they say about assumptions. But the bottom brackets remain solid after many miles of bumpy roads.
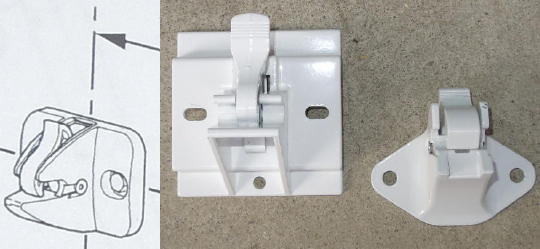
What the instructions showed. What was included. What I used.

Pioneer Lite awning arm with a Dometic bottom bracket.
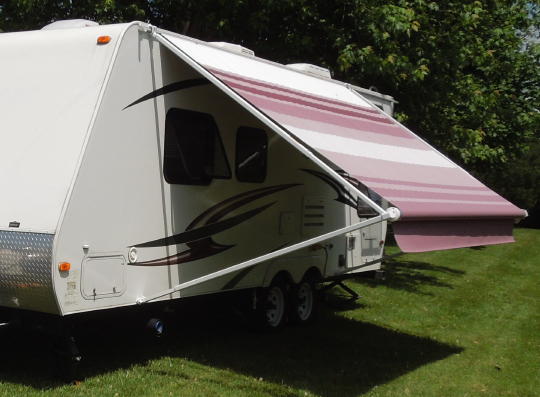
There's no streetside door so the awning can be kept low if desired.
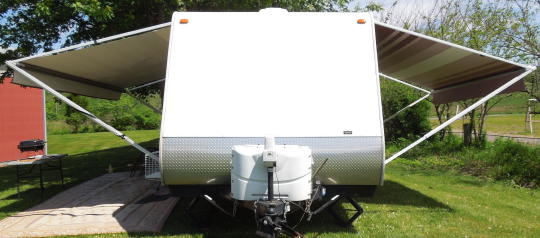
Ready for takeoff.
Interior Mods
The Trail Sport 24BH has more hanging space than we need. So I added a narrow plastic modular drawer unit to the rear closet. Different sized drawers can be combined to create a unit of any height. First I cut a piece of ½" plywood to cover and strengthen the closet floor. Then I set the drawer unit and screwed its frame to the back wall of the trailer. The drawers are secured with a bungee cord while underway. There's a tall narrow space on each side of the drawer unit for storing thin items like brooms and trays. And we still have some hanging space in smaller closets at the front of the trailer. After a year's use I modified the drawer unit with thin hardboard side panels. The panels prevent items beside the drawer unit from falling behind and jamming an open drawer.
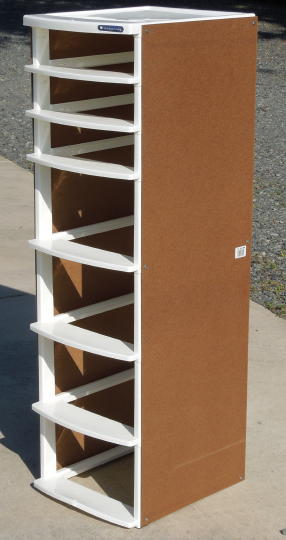
Modular drawer unit modified with hardboard side panels.

Rear closet with drawer unit installed.
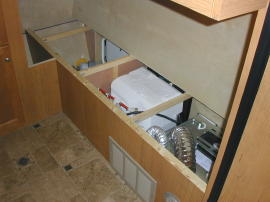
There are several areas where R-Vision failed to take full advantage of potential storage spaces. The pictures below show the cabinet below the rear hanging closet. A rear bulkhead protected a heating duct, but also walled off a lot of potential space. To the right of the cabinet was a hidden nook that could only be accessed by disassembling the lower rear bunk. I removed the rear bulkhead and cut out the right-side dividing wall. Then I boxed in the heating duct. The cabinet is now about 8" deeper and 8" wider.

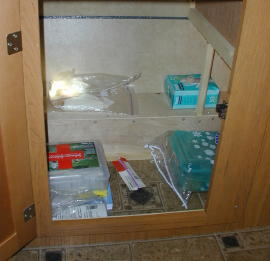
Before and after. The modified cabinet space is about 8" deeper and 8" wider.
Before and after. The aforementioned hidden nook is now part of the enlarged cabinet.
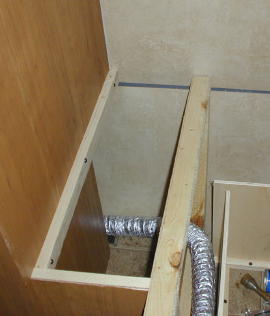
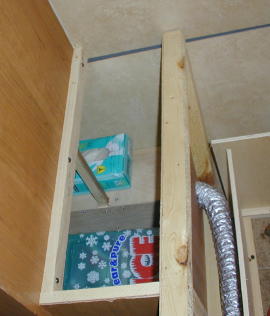
Shown below is the rear external storage compartment. Inner bulkheads protect the heating duck and tail light wiring. Again, I removed the bulkheads and boxed in the duck and wiring.
Rear external storage compartment before and after expansion modifications.
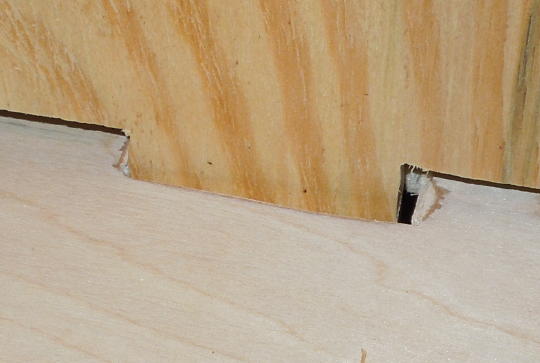
The plywood under the rear lower bunk was screwed in place. I wanted easier access to the water heater and furnace (especially for winterizing the water heater). I cut the plywood lengthwise and added a piano hinge. The narrow wall-side piece is still screwed down. But the larger piece simply lifts up and out of the way.

Rear bunk plywood with piano hinge down and up.
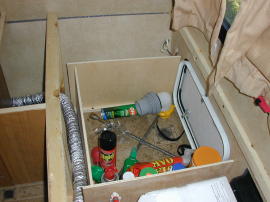
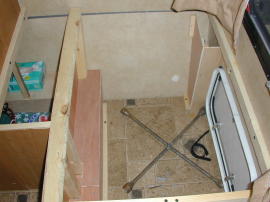
There was a shallow storage cabinet under the refrigerator. Removing the bulkhead revealed a bunch of utilities over the wheel well and a propane supply line for the refrigerator. The propane line is made from heavy copper tubing with plastic sheathing. I decided the line was sturdy enough to go unprotected so I moved the bulkhead back to the wheel well. Nevertheless, we'll reserve this storage space for items that are light and soft.
Shallow storage under the refrigerator.
Expanded storage under the refrigerator.
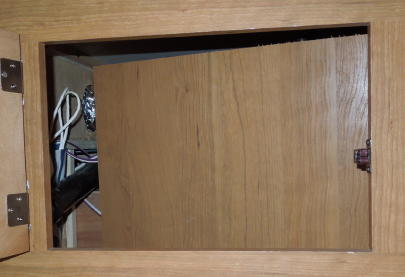
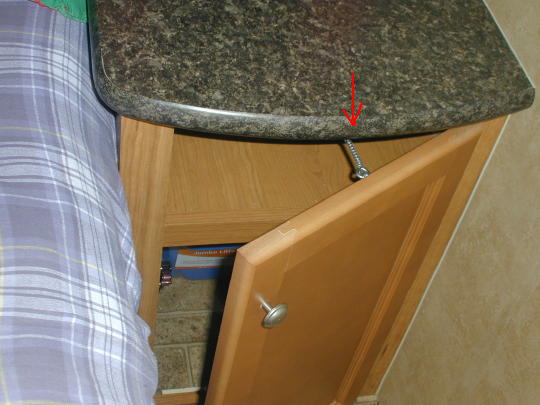
I made a cabinet door to access storage space under the dinette bench without having to lift out the seat cushions and support boards. I had no hope of duplicating the original millwork. So I tried to match the black & panel look of the galley appliances. I used a router to round the frame edges and make a rabbet for the insert panel (which was cut from the bench). I also used the router to make a finger pull instead of adding a protruding handle. In retrospect, I should have made the door a bit smaller with an inch or two of clearance between the bottom of the door and the floor. As it is, any throw rug on the floor gets in the way of opening the door. Update: I eventually ripped ½" off the bottom edge of the door frame. The result (not shown below) doesn't look terribly unsymmetrical and the door works better.
Cabinet door added to dinette bench.

Cabinet door added to dinette bench.
Opening the cabinet door in the bathroom revealed an upper shelf and a lower access panel for a pipe chase. I simply removed the lower access panel. This is a good place to store extra paper towels and toilet paper - items that won't damage the plumbing.

Pipe chase storage at the bottom of the bathroom cabinet.
We had no intentions of using the upper rear bunk as a bunk (no ladder was provided anyway). The upper bunk does make a good storage shelf. But it juts out too far. The corner was a source of bruises. The upper bunk was too wide for comfortable seating on the edge of the lower bunk. Also, the upper bunk was too wide to reach the upper window knob without a stepstool. I disassembled the upper bunk components, made some cuts and reassembled the parts. The bunk/shelf is now a narrower "L" shape and is flush with the refrigerator. The lower bunk is a bit more comfortable, I can reach the upper window and the RV feels a little bigger.
Upper bunk (left) to storage shelf (right).
While I had the upper bunk/shelf disassembled, I ran internal wiring for an under-shelf reading lamp. The lamp is meant to provide a variety of lighting effects for someone reading or sleeping on the lower bunk. The product is from Star Lights Inc. and comes with a modular selection of optional features. I configured the unit with a dimmer knob for the main lamp and a small separately-switched night light.
Star Lights Inc. lamp unit with a dimmer knob for the main lamp and a small separately-switched night light.
The cabinet above the dinette table has a shallow nook for a small flat screen TV. I built some slats and made a bookrack. I also added a magazine rack.
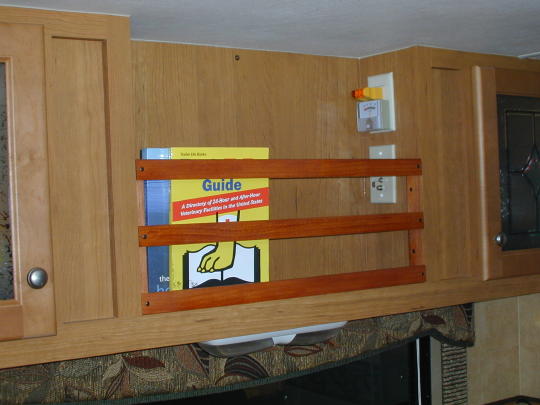
Book rack.
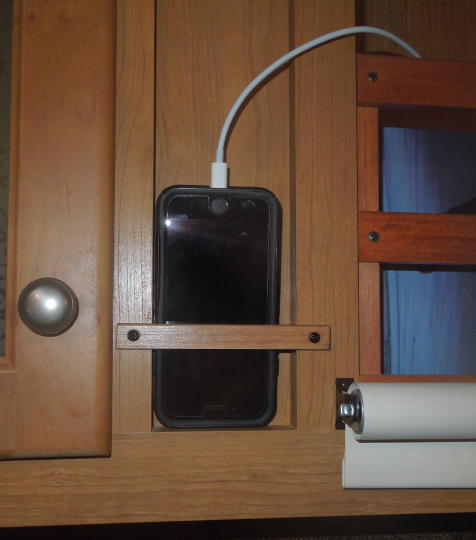
One more small slat makes a smartphone charging nook.
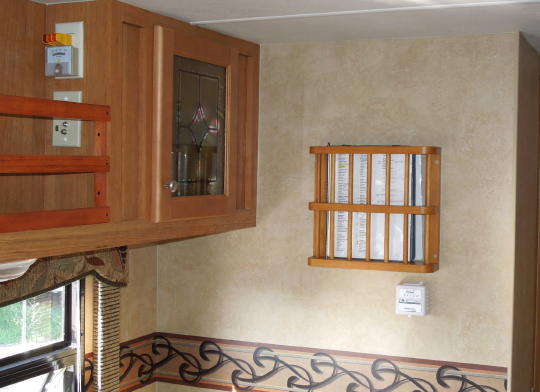
Magazine rack.
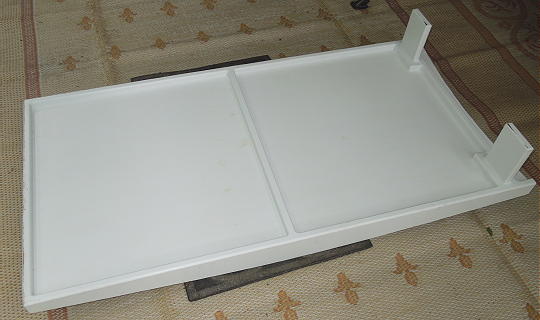
I built a long narrow shelf between the dinette bench and the door. The shelf is great for staging drinks and other small items that can be quickly passed in and out of the screen door hatch thereby minimizing fly infiltration. In practice the shelf is mostly used by the cat as another window perch. Under-shelf hooks store dog leashes. I also added a drop leaf shelf next to the sink for a little more counter space. And I built a corner shelf next to the upper galley cabinet which frees up some more counter space. Note: folks have asked about the drop leaf shelf hardware. The hardware came with the shelf which was purchased from an RV supplier.
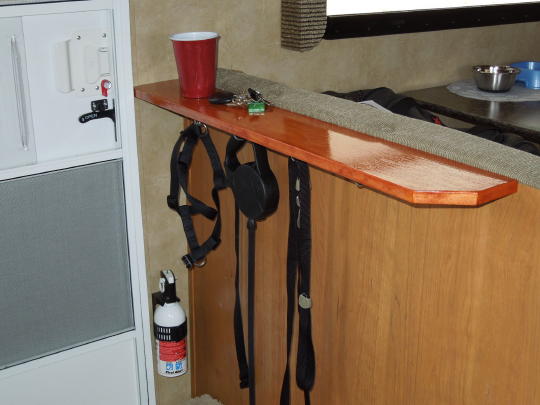
Door shelf.

Drop leaf shelf.
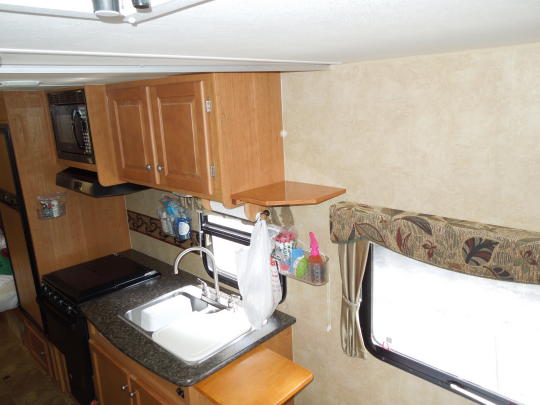
Upper cabinet corner shelf.
I built a shelf inside the upper galley cabinet to divide the space horizontally. There's still a space on the left side for tall items like cereal boxes.
Upper cabinet inner shelf.
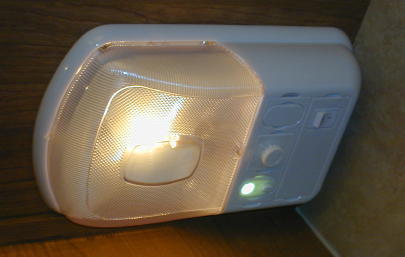
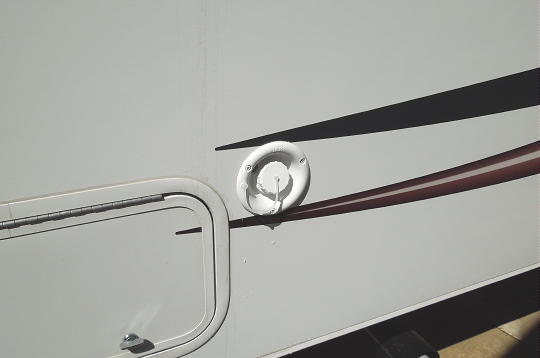
The air conditioner blasted cold air out either end toward the sleeping areas which could be uncomfortable. I cut a hole in the ceiling shroud directly under the duct collar and added a D&W (8840WH) Spaceport Air Conditioner Ceiling Vent. Opening the new vent significantly reduces air flow from the ends of the ceiling shroud. The new vent can be swiveled in any direction such as toward the galley or dinette area. Or it can be closed off.
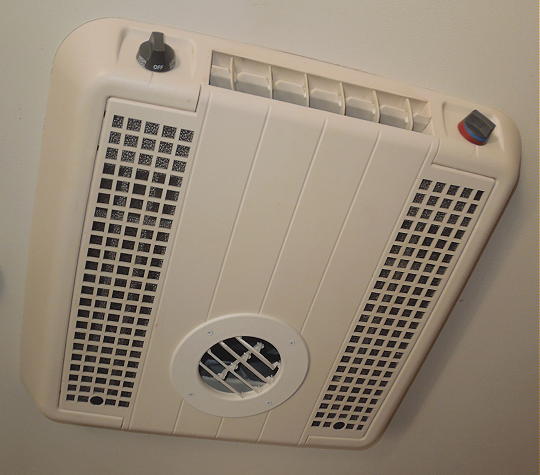
New AC vent.
There were three vacuum-formed drawers under the galley sink. They were kind of cheesy and began to crack after seven years of bumping down the road. Also, the plastic on wood runners made a horrendous screeching sound. Time to make new drawers. First I reworked the cabinet with new drawer runners made from aluminum angle stock. The aluminum runners will allow my new drawers to be a bit taller and wider. Note the stop block (red arrow) to prevent the top utensil drawer from bashing into the sink drain. Note that the cabinet door latch (green arrow) was relocated. I rejected the idea of ball bearing drawer slides because more friction is a good thing in this application. I don't want the drawers bumping back and forth as we're going down the road. In retrospect I'm a bit concerned that the ends of the aluminum runners may bend if the drawers tip out. But the old drawers always tipped out so we're accustomed to holding on when fully extending a drawer. We'll see...
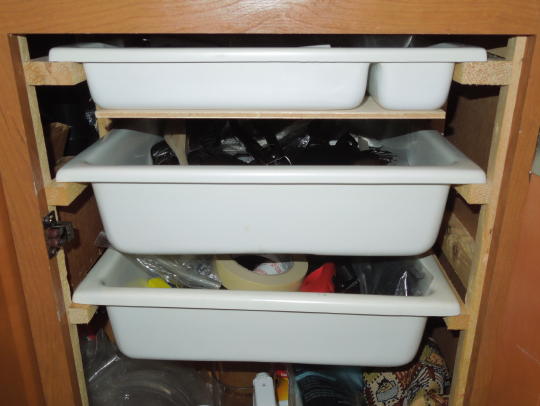
Old drawers with wood drawer runners.
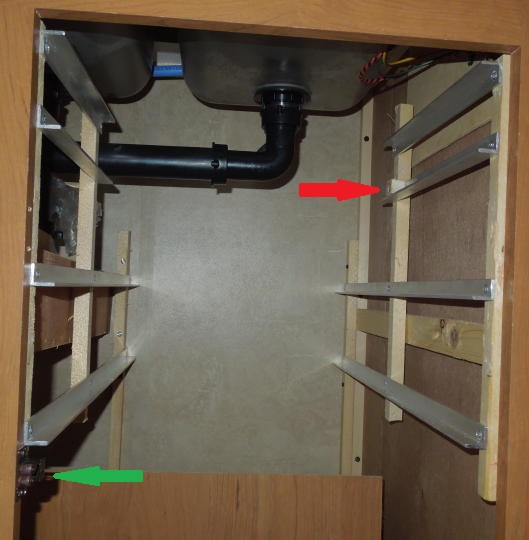
New aluminum runners. Note the stop block (red arrow) and the relocated cabinet door latch (green arrow).
The new drawers are made from a combination 1⁄8" and 3⁄8" plywood. Some drawers have dividers secured in dadoes. Everything is just glued together. The two larger lower drawers have "tails" to help prevent them from tipping out. Or at least that's the theory.
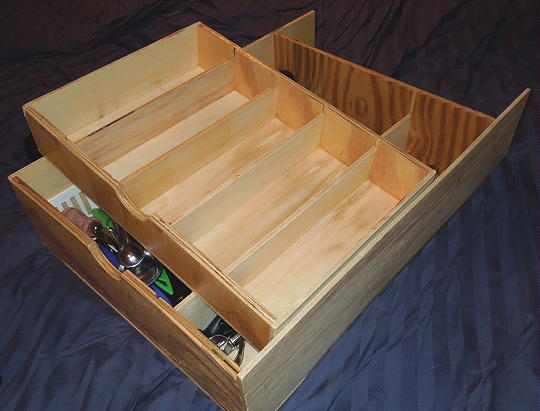
New drawers.
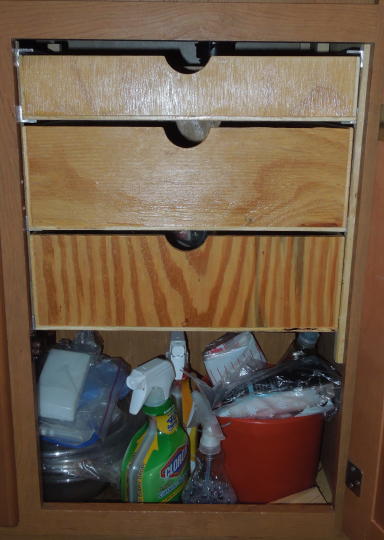
Done!
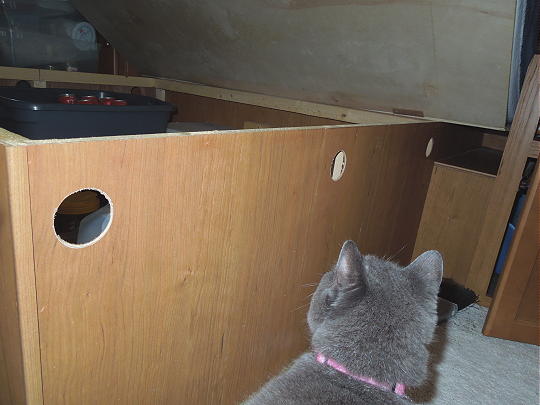
The Trail Sport 24BH features a pass-through storage compartment at the front of the trailer. It's a great place to keep Scruffy's litter box. She can get to the litter box through an inside cabinet door. I can get to the litter box through an outside hatch. I added a hook latch to the inside cabinet door. This creates a fixed opening that's big enough for the cat, but too small for the dog. The door remains closed while underway.
Inside access to the pass-through storage and litter box.
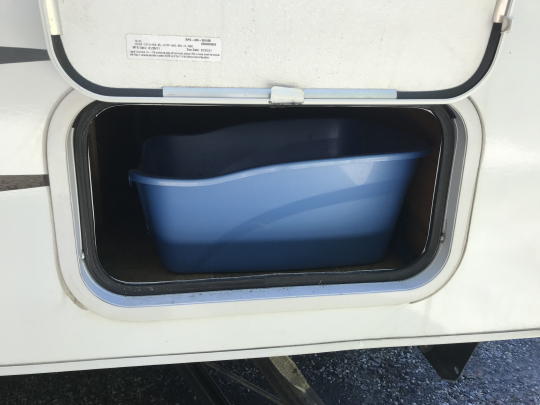
I can get to litter box via the front curbside hatch.
I wanted to make the litter box area more water(pee)-proof. The floor and side wall are made from nonporous materials. But the front bulkhead is some sort of thin crappy plywood. I used contact cement to cover the bulkhead with sheet PVC. Then I applied silicone caulk to the all the corners and seams. Any litter box "overshoots" are easily wiped up.

Sheet PVC and caulk.
Eventually I decided to divide the front pass-through storage. I keep my set up junk inside the streetside hatch and I didn't want to risk losing the cat because I forgot to close the hatch.
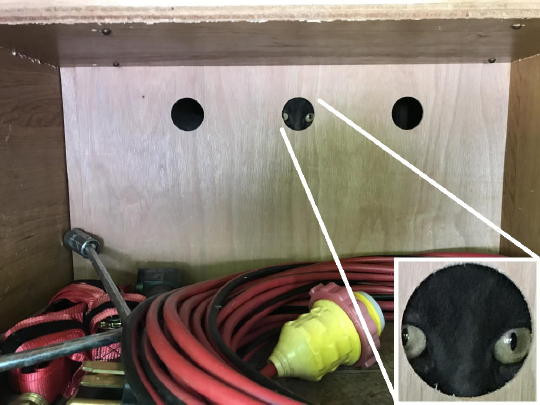
Smokey glares in disgust at her loss of real estate.
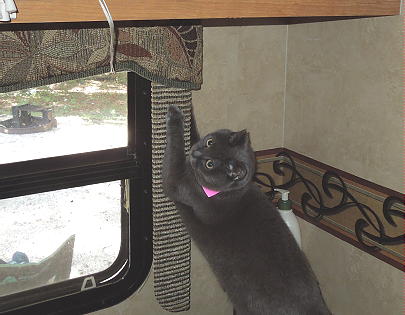
I bought a 100' package of ¼" sisal rope which I wrapped around the front table leg. Each end of the rope is secured with a screw-mountable zip tie. Now the leg is a scratching post.
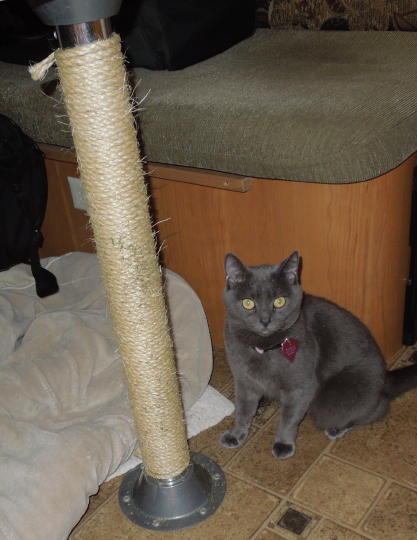
The scratching post.

Scratching post detail.
"I likes window treatments more better."
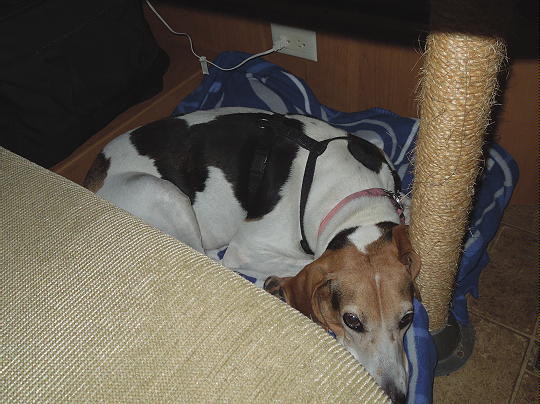
The dog likes sleeping under the table so I made more room by removing the wall-side (not the scratching post) table leg. The wall-side of the table is now secured to the wall itself. Note that we never convert the dinette to a bed. The wall is flimsy, but there should only be verticle forces from the new table bracket.
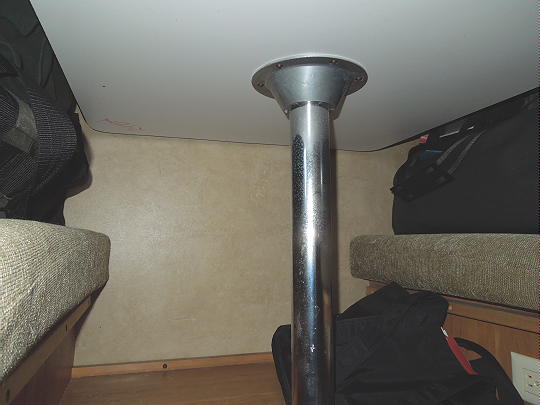
Before.
After.
Done.
I made a shoe rack from ½" CPVC pipe fittings. I used CPVC simply because the color went a little better with the RV as opposed to the stark white of PVC. The pipe caps were a bad idea. They make for a finished look, but incessantly snag shoelaces.

Shoe rack.

The shoe rack holds up to six pair of shoes.
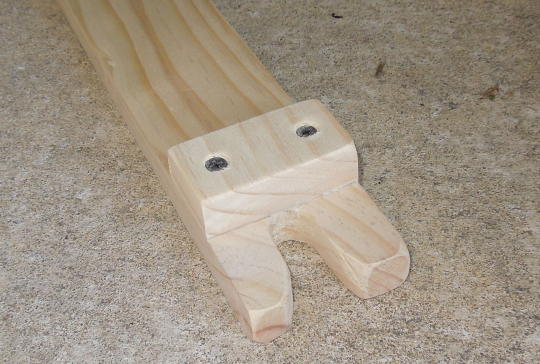
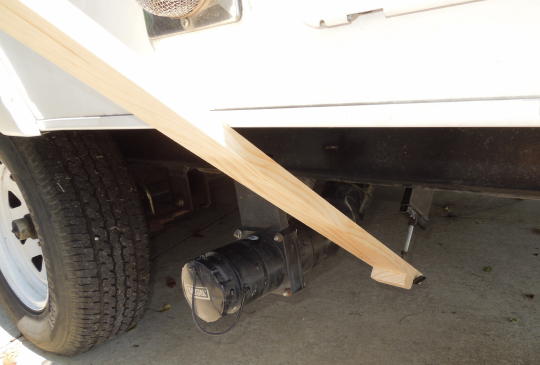
The front queen bed lifts up to access a large storage space. The bed was originally equipped with a metal rod that was awkward to set up. I replaced the rod with a self-deploying prop stick made from two boards and three hinges. When the bed is down the prop stick folds against the underside of the bed. The stick unfolds as the bed is raised. I also added a 20 lb. gas spring to make the bed a bit easier to lift. The gas spring isn't strong enough to hold up the bed, but it does push the middle elbow joint slightly past center. So as the bed is raised the prop stick automatically locks. Lowering the bed requires a gentle forward push on the elbow to unlock the prop stick.

Prop stick partially deployed as the bed is raised.
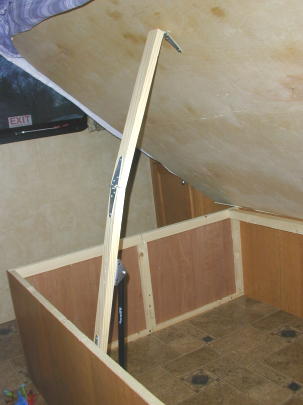
Prop stick fully deployed with the elbow locked.
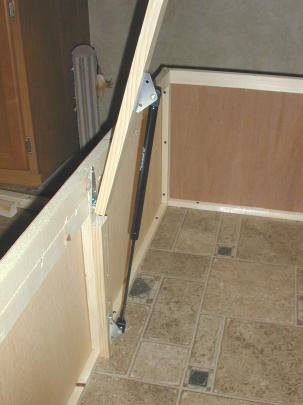
Gas spring detail with prop stick fully deployed.
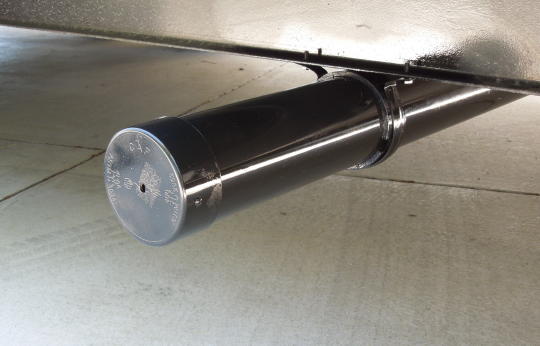
Update: My prop stick wasn't really intended as a lift assist. I'm sure the geometry is less than ideal. But years later the wife was struggling after we bought a new, much heavier mattress. I replaced the original 20 lb. gas spring with a new 60 lb. model (JR Products GSNI-5300-60) which turned out to make a significant difference when lifting the bed. However, the bed's flimsy base frame was not intended to deal with non-vertical forces. To counter the new spring I added a 1x3 length of poplar to horizontally stiffen the top edge of the base frame. Next I need some better, less-worn hinges to get rid of excessive side to side play in the prop stick.
One feature we didn't get with this RV was a sofa. Within our allotted length, we just couldn't find a floor plan that included a sofa along with everything else we wanted. The lack of a sofa is a nonissue except for those few days per season when the weather is just too nasty to lounge around outside. Inside there's no comfortable place to sit for hours at a time. I decided to make a backrest for the front bed. In a futile attempt at aerodynamics, the front wall of the RV slopes inward over the head of the bed which is pretty uncomfortable to sit against. I cut a 2½' by 4' piece of 3⁄8" plywood to set up as a backrest. Normally the piece lays flat in its stowed position between the bed platform and the mattress. It's thin enough that I can't feel it through the mattress when sleeping. In lounge mode the plywood is setup against the front wall as a backrest. Note the two tabs that fit into slots I cut into the bed platform. Note the lift cutouts that also serve to allow the backrest to lay flat over the platform hinges. Not shown in the pictures below is the beach towel that we drape over the top edge of the backrest so it doesn't damage the front wall finish. Next we pull the mattress up over the backrest. With the addition of some extra pillows it's a pretty comfy place to lounge around on a dreary day. It's kind of a pain to set up, but again, it's something we would only bother with a few times per year. Up or down, the backrest does not interfere with access to the under bed storage. Update: Years went by and we never really used this contraption. Eventually I discarded the plywood backrest.
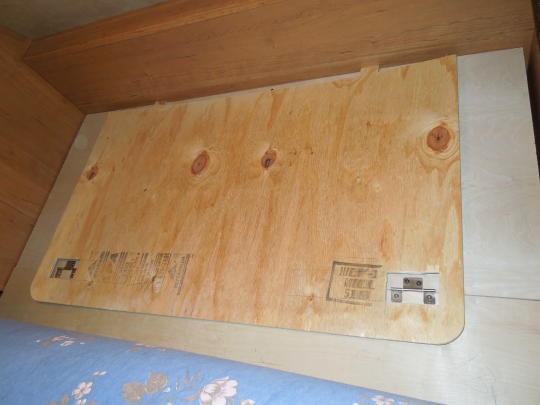
The backrest in its stowed position. Note the two tabs at the far edge of the backrest which fit into a pair of slots cut into the bed platform. Note the cutouts for the hinges that also serve to handle the backrest.
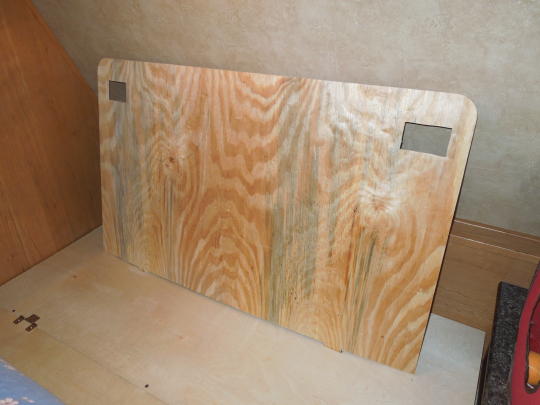
The backrest raised with the tabs fitted into the slots. A beach towel is added over the top edge of the backrest to protect the front wall finish.
Tab and slot detail.
Mattress pulled up against the backrest.
The trailer stays noticeably cooler with the outer door open in addition to all the windows. So in the interest of further pet-proofing the inner screen door I added a Camco screen door grill in front of the lower screen panel as well as an extra door latch made from part of a barrel bolt. The barrel bolt is shimmed with a thin piece of plywood and can be operated from inside or outside via the screen door hatch.
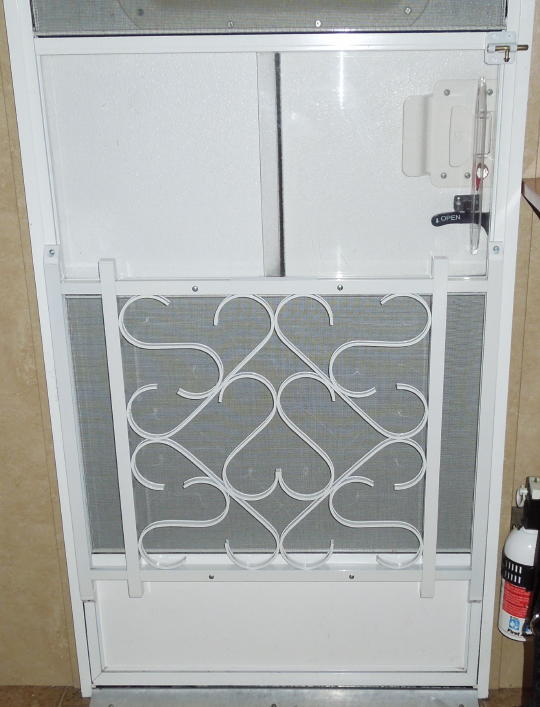
Camco screen door grill and extra barrel bolt door latch.
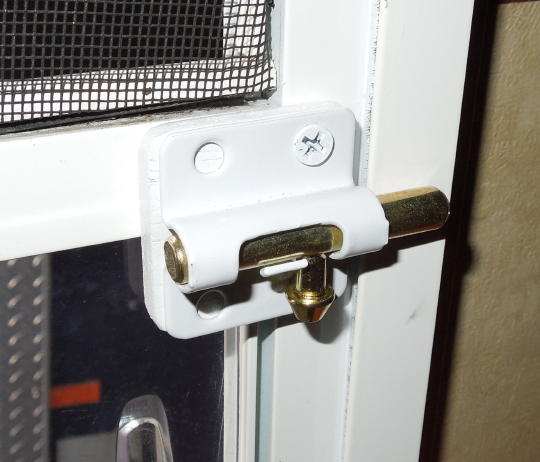
Extra barrel bolt door latch.
There's a double-bulb 12 volt light under the cabinet above the dinette table. Sometimes the bright light is handy, but other times it's far too harsh. I tried to think of some sort of lamp shade to put around the light. But then realized I could make an adjustable lamp shade from an inexpensive vinyl roller shade. I picked beige. I simply had the shade cut to size and mounted it to the front of the cabinet. Pulling down the shade blocks the light from line-of-sight and adjusts the amount of light reflected to the table.
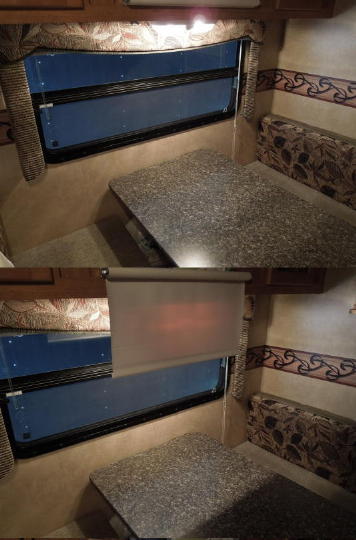
Roller shade in front of the dinette table light.
Plumbing Mods
I added a small accumulator tank at the output of the water pump to cut the noise of excessive pump cycling. This was a simple installation since the pump was already hooked up with threaded hoses. One additional hose completed the installation.

Accumulator tank.
I wanted an easy way to drain the water heater without messing with the plug. So I replaced the plug with a metal braded hose and a ball valve. A lot of people warn not to mix metals with the water heater tank, so I used a nylon nipple between the tank and hose. I also cut down the valve handle so it doesn't interfere with the burner. Cracking the pressure valve helps drain the tank.
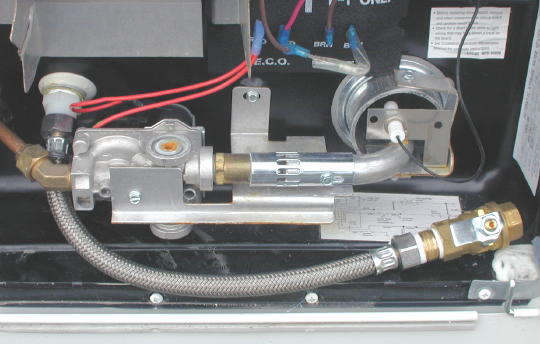
Water heater with hose and drain valve.
Update: In reality I only ever drained the water heater once per year at the end of the season. Then I had to remove my hose contraption anyway to get after the tank with my flushing tool. So I scrapped the above hose and drain valve arrangement and went back to the stock nylon plug.

Water heater flushing tool.
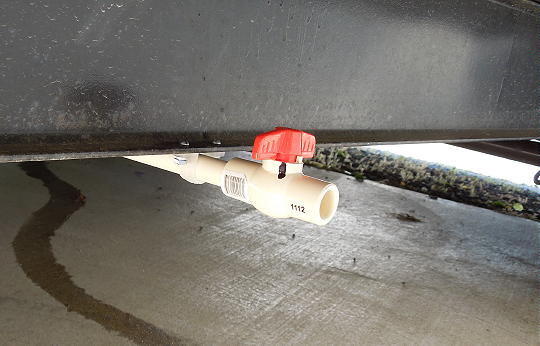
The gray and black tanks each have their own waste valve leading to a common bayonet outlet. Each tank is 30 gallons so the gray reaches capacity long before the black. I cut the pipe behind the bayonet outlet and inserted a third waste valve common to both tanks. By closing off the common valve I can gravity drain a portion of gray water into the black tank until the two tanks equalize. I only leave the black valve open long enough to facilitate the transfer such that no black water mixes back into the gray tank. This procedure can extend our stay at locations without full hookups. I can also use this valve arrangement to back-flush the black tank with gray water. It's also good insurance against any one valve leaking. I had enough clearance to vertically orient the common valve such that it doesn't block the original valves to either side.

Third common waste valve.
As shown above, the original gray and black waste valves are oriented at a 45 degree angle toward the ground. There's really no good way to get leverage on these things without crawling under the trailer - not something I want to be doing at a dump station. Here's where I want to hunt down the person who devised this arrangement and kick their ass. I made a 4' lever from a 1x3 board. On one end I added a notch and cleat to grab the valve handle. To open a valve I grab the handle with the notch and pry up against the trailer body. To close a valve, I push up on the handle while prying against the ground. The angle between the board and valve changes as the valve moves. So I don't try to open and close in one motion. Rather, I reposition the board once or twice as I go.
1x3 pry board with a notch and cleat.
Prying against the trailer to open a valve.
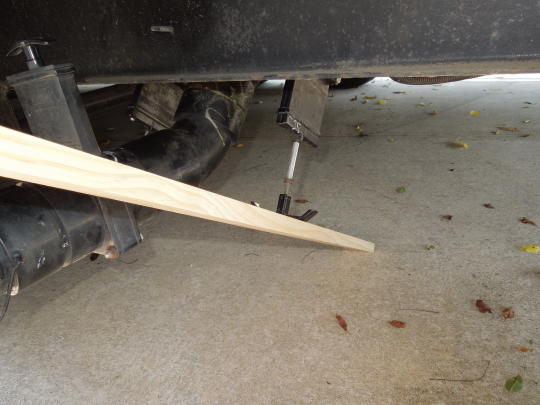
Prying against the ground to close a valve.
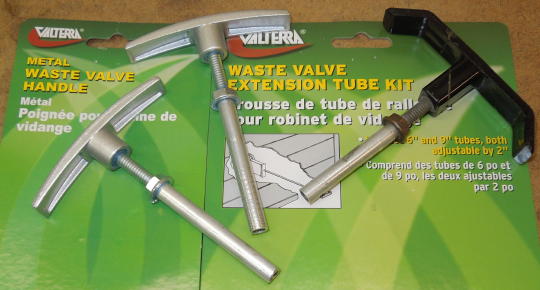
As shown above, the original gray and black waste valves had 2½" handle extensions. These are easily lost, but can be readily fabricated from any waste valve handle extension kit. The kits come with one or more lengths of hollow threaded tube which can be cut or combined to any desired length. Best to put it all back together with some thread lock.
Fabricating waste valve handle extensions.
I foresaw problems with the trailer's downward facing waste valve arrangement. Any crud that gets into the blade housings has no way of ever getting back out. And the crud seems like a freeze hazard. What's worse was that the valve arrangement was so tightly sandwiched between the gray and black tanks that the valves were unreplaceable. Unbolting the valve bodies was useless. There simply wasn't enough wiggle room for the valve gaskets to clear their respective inner pipe flanges. That said, the original valves lasted nearly 14 years before the blade housings began to crack and the blades became sticky to the point of being unuseable.

Waste valves tightly sandwiched between the tanks.
I didn't think the gray tank would be movable because there are drain and vent pipes coming down to both sides of the tank. But, I thought I might have some streetside wiggle room with the black tank. My solution was to cut the steeetside end of the black tank's rear support rail. That is, I replaced the weld with a bolt-on bracket. As indicated by thre red arrow below, I can unbolt the rail and slightly slide it back along the top of the bracket. This allowed me to slightly pull the black tank back away from the gray tank, which gave me just enough pipe flange clearance to replace the valves. While I was replacing the valves I had support blocking under the black tank. And I used a small C-clamp as a stop to make sure I didn't push the rail all the way off the end of the bracket.
Perhaps this was more of a repair than a modification, but I felt like ranting. I'll say it again - the person who devised this waste valve arrangement should have their ass kicked.

Before.

After.
A popular Internet solution for lubricating waste valves is to drill a lube hole into the blade housing. Due to my odd orientation, I drilled two holes into each of my new waste valves - a drain hole and a vent hole. Both are plugged with screws and black silicone gasket maker. At the end of the season I'll remove the screws, blast out the crud and squirt in some lube. Silicone grease of the sort used for faucet gaskets appears to be a safe bet. Note that none of this nonsense is required for my add-on third waste valve since the blade housing is oriented upright.

Vent and drain plugs.
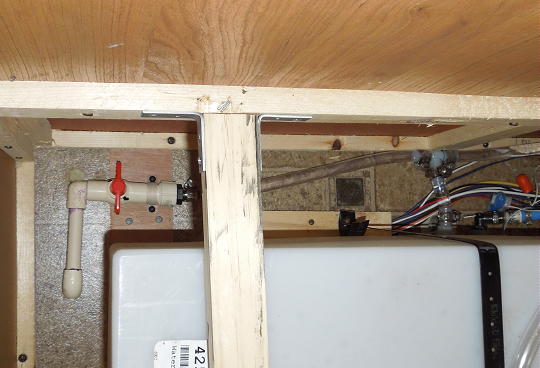
Having effectively increased the trailer's waste capacity to 60 gallons (see common waste valve mod above), it was time to do something about the fresh water capacity. We never boondock, but we often find ourselves in places without a convenient city water connection. The trailer's original 30 gallon fresh water tank worked okay with some judicious conservation, but we were looking for a bit more capacity. Another thing I don't like about the original tank is its unconventionally located curbside water fill. The trailer has a front queen bed with a lot of storage that was generally underutilized. So I decided to add an extra 20 gallon tank with its own streetside water fill. Total fresh water capacity is now 50 gallons. Installation of the new tank was conventional and straightforward. But due to the trailer's layout, there was no way to connect the two tanks internally. So I routed each tank's drain port through a shutoff valve to an under-trailer connecting pipe made from CPVC fittings. The connecting pipe is also fitted with a drain valve. By manipulating the three valves, I can drain either or both tanks. I can also isolate both tanks and drain just the connecting pipe which is handy for nights below freezing. With both isolation valves open and the drain valve closed, the tanks equalize as water is used. I can also fill both tanks from the new streetside water fill. But it's actually faster to fill the tanks individually thanks to the small diameter of the connecting drain ports. 20 gallons of water adds another 160 pounds to the front of the trailer. I don't know what the engineering implications of that may be, but I only fill up the new tank after we reach our destination. Years later... Those CPVC ball valves can become stiff over time and I feared I may break a pipe in the process of turning the valve. Eventually I replaced some of the ball valves with stop valves which are more restrictive, but at least serviceable.
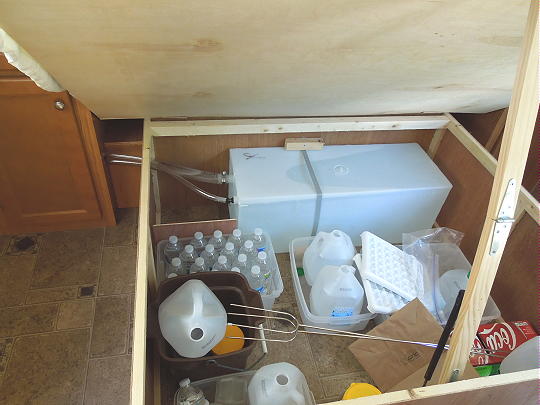
New 20 gallon tank.
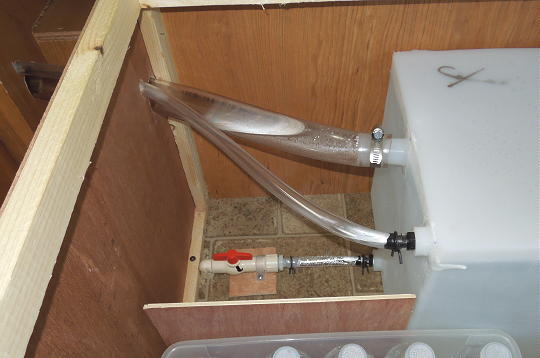
New tank connections.
New streetside water fill.
Looking down at the original tank drain reconfigured with a shutoff valve leading to the under-trailer connecting pipe.
Connecting pipe drain valve.
Update: We experienced a musty condition under the front queen bed which I believe was caused by condensation on the 20 gallon tank. Using a hole saw, I cut a series of vent holes down each side of the bed base. The bed spread hides the holes and the mustiness is gone.
Smokey inspects the under-bed vent holes.
Despite my efforts to expand our fresh water and waste capacities, we still occasionally find ourselves wanting to extend our stay at a site without water and/or sewer connections. First I bought a seven gallon water jug I found at Walmart. I liked the jug's squat cubical shape that won't easily tip over. The jug came with a spigot that was screwed into the cap via ¾" pipe threads. I replaced the spigot with a nylon nipple and added an RV fill tube with shutoff valve. Lifting a seven gallon jug to the RV's fill hole isn't fun, but it's a relatively cheap and easy way to add a little more fresh water when needed. Next I bought a five gallon waste tote. I use a sewer cap with a garden hose connection and a short length of hose. I only use the tote to drain off gray water so it's relatively not that nasty of a project. Five gallons is pretty puny, but its use is infrequent and I was more interested in compactness than capacity.
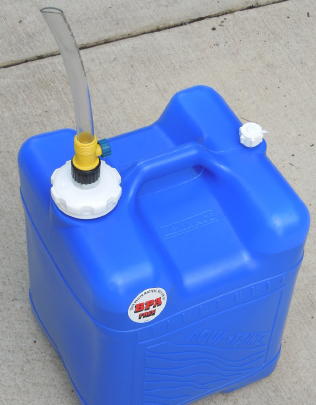
Walmart jug with RV fill tube.
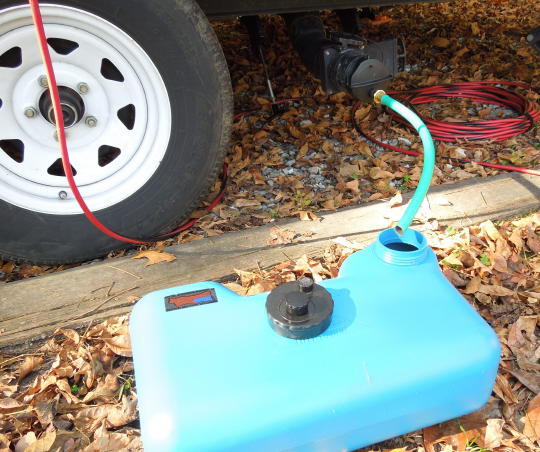
Five gallon tote with gray water drain setup.
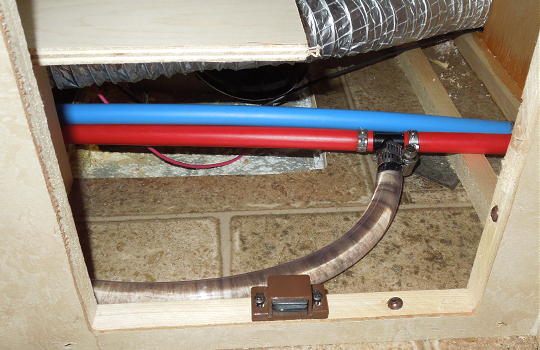
There's a meandering 25' of plumbing between the water heater and the bathroom. I felt we were wasting a lot of our freshwater in the process of waiting for hot water to reach the bathroom. Not just wasting freshwater, but wasting gray tank capacity as well. I devised a circulation line to divert this otherwise wasted water back to the freshwater tank. The circulation line begins under the tub which is the farthest point from the water heater. The line routes through a control valve and back to the freshwater tank. Opening the control valve activates the RV's on-demand pump. As hot water moves toward the bathroom, the displaced cold water is circulated back to the freshwater tank. After a ten-count, the control valve is closed and hot water is immediately available at the vanity sink and tub. Update: The plain vinyl hose shown below began to deform under pressure on the input side of the control valve. So I replaced that section with braided vinyl hose having a much higher working pressure. There's little pressure on the output side of the control valve so I left the rest as is.
The beginning of the circulation line is teed off the hot water line under the tub which is the farthest point from the water heater.
The control valve is perhaps my most redneck creation to date. I wanted something that would be convenient to use yet inconspicuous in what is already a tight bathroom. I came up with a ball valve design that's hidden under the sink and operated from outside via a rod and knob. I chose a cabinet knob with a finish matching the existing cabinet hardware.
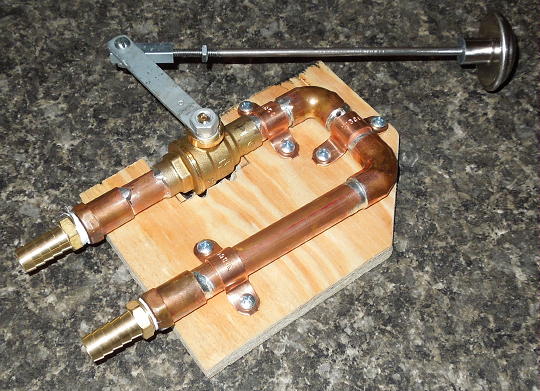
My redneck control valve.
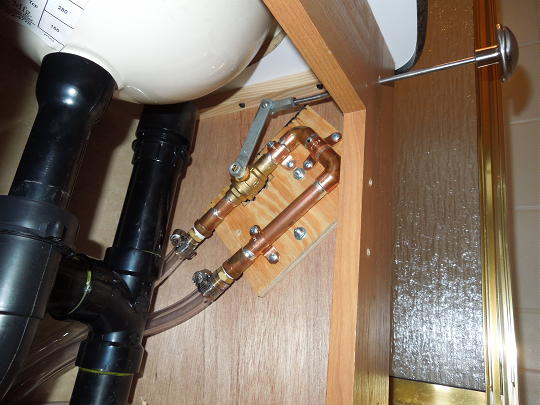
Here's the control valve mounted under the sink. Pulling out the knob as shown opens the valve.
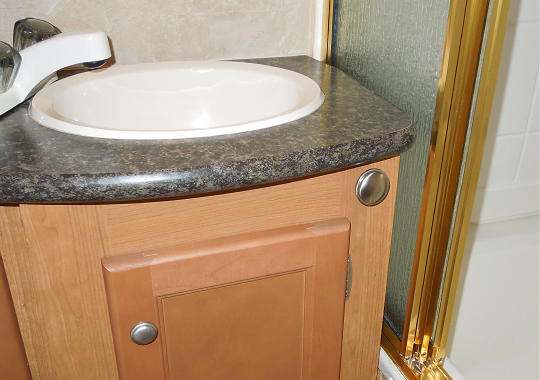
Here's everything back together. The valve is normally closed and the knob inconspicuously tucks under the front edge of the sink countertop.
The end of the circulation line feeds back into the freshwater tank at the tank's drain port. The right leg of the tee is the circulation line. The left leg of the tee leads to my auxiliary 20 gallon freshwater tank described above.
I only had two major complaints about the fit and finish of the new trailer. The bathroom door opening wasn't quite square. I fixed that by planing down the hinge side of the door. The second problem was more complicated. The structure supporting the floor of the tub was a smidge too high relative to the perimeter support. So the ledge around the tub sloped out toward the walls instead of back into the tub. Shower water would collect on the ledge and run out onto the bathroom floor.
The tub floor support comprises a table-like structure of plywood and legs. I decided to cut ½" off the bottom of each leg. Fortunately the table was only pinched in place and not screwed to the floor of the RV. I bought a Dremel Multi-Max tool with a flush cut blade to do the job. I can't think of any other tool that could have squeezed into such a tight space. The job still cost a lot of contorting and sore muscles.
After I shortened the table legs I cut a piece of plywood to apply weight to the inside edges of the tub ledge. The tub has somewhat reshaped itself over time. It's not great, but better than it was.
Here's the tub area with bathroom door, access panels and furnace vent removed. Not much room to work.

Two of the four table legs. The two legs out of view were difficult to get at and there was plumbing and wiring to be avoided.

Plywood and weight applied to the inside edges of the tub ledge.
I replaced the shower curtain with a Irvine triple slide shower door. The product seemed cheaply made, it wasn't packaged well and the instructions were horrible. Nevertheless, the door has worked out well and is way better than a curtain. Shown further down is an inner plastic hook for holding the shower door open for travel. That's not how the instructions show the hook, but it's the only way I could figure to make work. It sort of works. Overall, I guess I'd recommend this product if you're a handy person.

Irvine triple slide shower door.
Crappy shower door hook.
Update: As expected, the crappy shower door hook didn't last long. I replaced it with a small eye bolt and bungee cord.

Eye bolt and bungee cord.
Electrical Mods
I added a battery cutoff switch to isolate the battery from the converter and all interior loads. The switch can prevent the battery from being drained if the RV is disconnected from shore power for an extended period. The cutoff switch does not disconnect the battery from the tongue jack and breakaway switch.
Battery cutoff switch.
I keep a bottle of hand soap in the rear external storage compartment and use the external shower wand to wash up after visiting the dump station. I wanted to be able to control the fresh water pump from outside the RV. So I installed a second pump switch in the storage compartment. I mounted the switch in the bottom half of a small plastic project box so the switch does not get inadvertently bumped. The new external switch is simply wired in parallel with the existing internal switch. Both switches must be off for the pump to be off. Now I can shut down and lockup the RV before leaving the campsite but still have convenient control over the pump at the dump station.
New fresh water pump switch in external storage compartment.
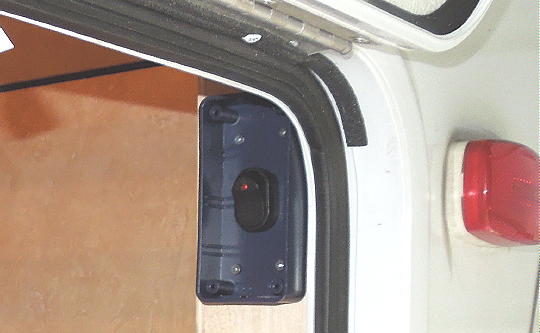
Switch detail.
Update: Instead of fooling with the external shower wand as noted above, I added a shutoff valve to the streetside low-point drain. Unlike the shower wand, there's nothing to set up; the valve is just there. I put the valve on the hot side since there's usually some leftover hot water. Cracking the valve produced a thin high-pressure spray that wasn't what I wanted. So I added a threaded fitting and a screw-on cap to the bottom of the valve. I drilled five small holes in the bottom of the cap to break up the spray and act as a makeshift showerhead. Now the flow and pressure is just right.
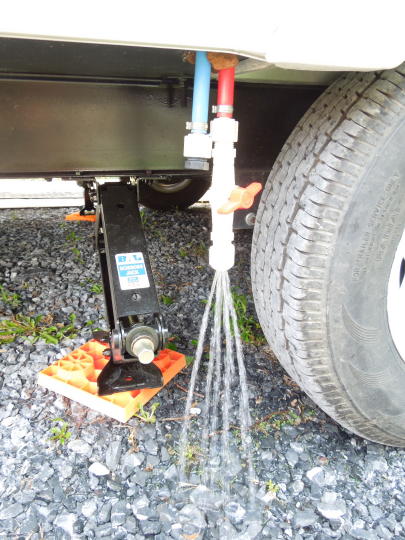
Low-point drain shutoff valve is handy for hand washing.
I added an extra AC outlet below the rear bunk.
Extra outlet.
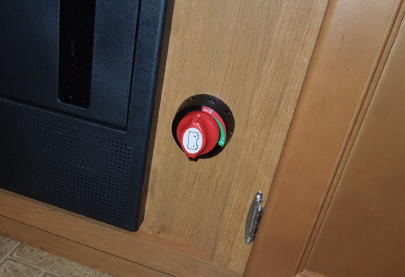
Since we don't use any of the connections at the TV nook, I added a plug-in polarity checker, an AC voltmeter and a DC voltmeter.

Plug-in electrical testers.
Update: the plug-in DC voltmeter was never easy to see so I added a digital panel-mount DC voltmeter.
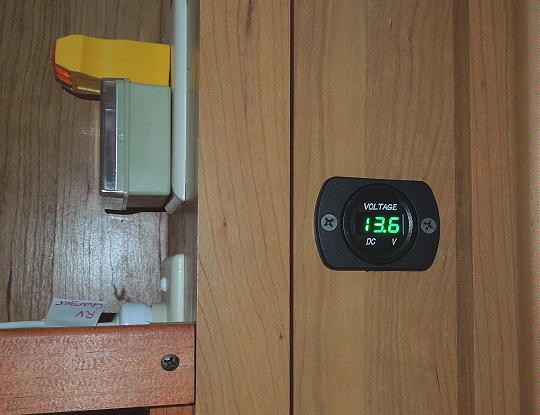
Electrical testers.
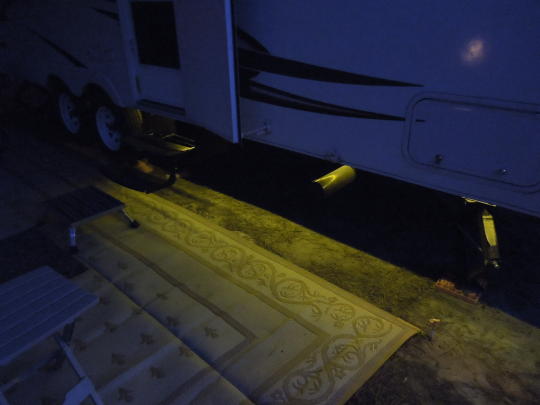
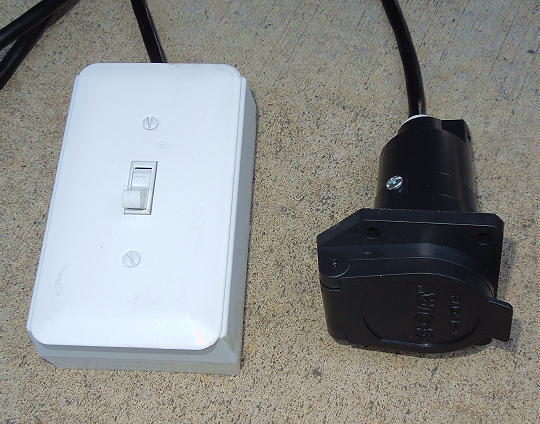
For a little ambiance at the campsite I sometimes like to turn ON the trailer's clearance lights. I bought an extra car-side 7-pin receptacle and wired it to a switch inside the trailer. The receptacle is mounted to the side of my aluminum battery box. I plug the connector into the receptacle when not plugged into to the tow vehicle. The switch is wired between the receptacle's 12 volt circuit (pin 4/black) and the clearance light circuit (pin 3/brown). Since the switch has a pilot light, there's also a ground wire (pin 1/white). I also added an inline fuse to the 12 volt circuit near the receptacle. In a more practical sense the switch could be useful in an emergency if I had the leave the trailer by the side of the road at night. Another advantage of this setup is that the trailer connector is always plugged into either the tow vehicle receptacle or my switch circuit receptacle. So weather and bugs are always kept out of the connector.
![]()
7-pin receptacle mounted to the side of the battery box.
![]()
7-pin trailer connector plugged into the receptacle.
![]()
Inside clearance light switch.
![]()
Lights at the campsite.
What I really wanted was a more subtle way of lighting the entry steps without the bright porch light. I bought a 12 volt amber LED strip which I stuck along the trailer's frame rail. I used about 10' of LED strip from the front of the trailer back to wheels. The LED strip had double-sided tape already applied. But I added my own layer of foam double-sided tape thinking the foam-type tape would better adhere to any imperfections along the frame rail. For power I added a second switch to my clearance lights circuit explained above.
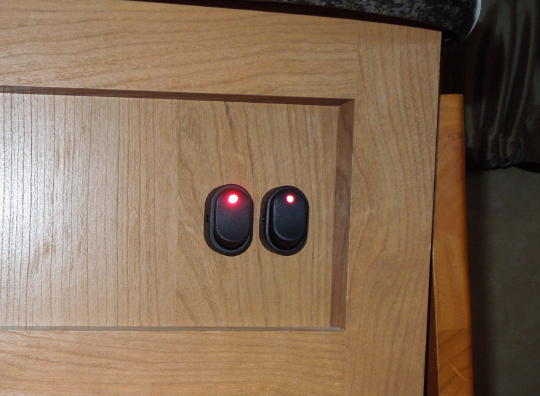
Second switch for the LED strip.

LED strip wiring at the front curbside corner.
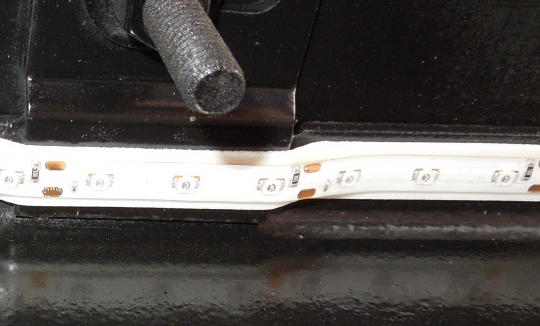
LED strip detail. The stip can be cut to size at every third LED
Amber LED strip.
I wanted a convenient way to momentarily test the electric brakes while servicing the hubs. I made up a cable with a trailer connector on one end and a switch box on the other end. The switch box also includes a 20 amp fuse. The switch connects pin 4 (battery) to pin 2 (brakes). Flipping my switch does the same thing as pulling the pin from the breakaway switch; except I don't have to leave my work area and walk to the front of the trailer. You should still periodically test your breakaway switch.
Brake tester.
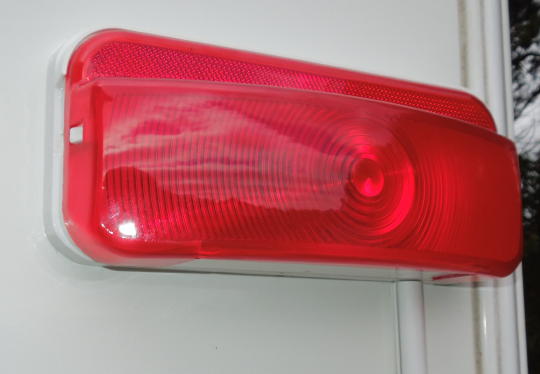
I added a redundant pair of tail lights that are up more at eye level. The new units are the same model as the originals. Wiring was an issue. I didn't think I could run wires within the laminate walls. And I couldn't run wires inside the trailer without removing the shower enclosure. So I kept the wires outside using a one-piece self-stick Wiremold product to connect the original lights up to my new lights. I made spacers from ½" plywood to fit between the RV and the new tail lights. The spacers provide a surface mount cavity for the wiring connections. The rear of each spacer has a side notch for the wires and a smaller center notch for a weep hole. Wood might seem like an odd choice, but I used plenty of sealer, paint and caulk. Plus I keep the RV under roof and wasn't too worried about long term weather exposure. The rear wall of the trailer has a lower curve that was too sharp for the Wiremold. I made a series of kerf cuts to make the Wiremold more flexible at the curve. The right side went together as planned. But I was able to skip the Wiremold on the left side because I found an internal wire chase at the rear left corner of the trailer. I included wiring for the clearence light circuit, but didn't make the final connections. I though my new lights would be more dramatic if they always went from full-OFF to full-ON when I hit the brakes. I replaced all four of the #3157 bulbs with their red LED equivalents. While I was at it I also replaced all of the individual #194 clearence bulbs with thier red or amber LED equivalents. Note that the brightness of all these unsealed light fixtures can be vastly improved by removing the lens and cleaning the inside of the fixtures every few years. They do get dirty!
Back view of the right-side spacer.
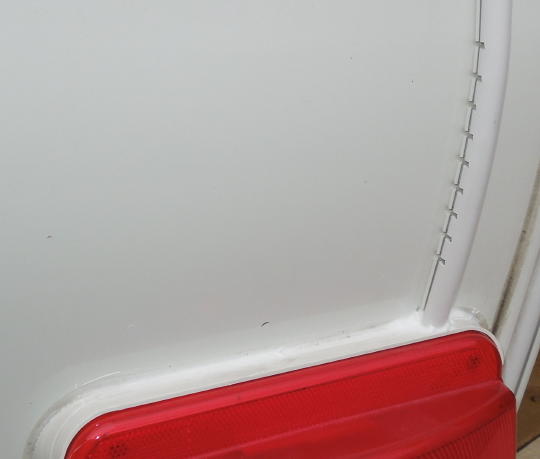
Wiremold exiting up from the original lower right tail. Note the kerf cuts.
Wiremold entering the spacer behind the new upper right tail light.
Done!