

The Rig
We have a 2006 Chevy Trailblazer equipped with 4WD, the 4.2 L6 engine and 3.42 gears. We did not anticipate towing an RV when we acquired the vehicle. But even a fully-loaded T-160 is well within the Trailblazer's 5,200 lb tow rating.

The Trailblazer comes with a 7-pin connector out back and all the pre-wiring. Remove the lower panel from under dash and you'll find the brake controller wires (with color code label) located above the parking brake pedal. I installed a Takonsha Prodigy controller. I knew I wanted an inertia-type solid state controller. Everyone seems to like the Prodigy, so that's what I bought too.
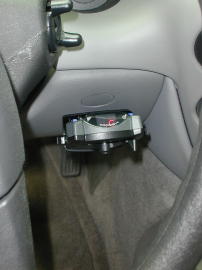
I mounted the Prodigy below and to the right of the steering wheel within arm's reach.
The Trailblazer also comes with a pre-wired, fused circuit for providing 12 volt auxiliary power to the trailer. Pop the hood and locate the stud at the front right corner of the fuse block. There's a red wire nearby. Put the red wire on the stud and you're good to go. The stud is protected by the 30 amp fuse right next to it. You need to provide your own 6 mm stud nut. I did not connect the wire since we don't do much boondocking. But, I did add the stud nut just in case.

Under hood fuse block showing the 12 volt wire, the stud and the fuse (6 mm wing nut not included).
I had an old ball mount that was the right height for the RV. But I thought the mount was unnecessarily long. It measured 10" from pin hole to ball hole. Ideally the hitch point should be as close as possible to the rear axle of the tow vehicle. There were no obstructions on the rear of the Trailblazer or the front of the RV, so there was no reason not to have a short ball mount. I looked around and found extra long ball mounts, but no extra short mounts. So I decided to make my own extra short ball mount. First I bought a new ball mount that had a more compact design. Then I cut a sliver off the tail end of the square tube because the Trailblazer's spare tire is hung right in front of the hitch receiver. Next I shoved the ball mount into the receiver as far as it would go and marked for a new pin hole. The results are shown below. My modified extra short ball mount measures only 6.5" from pin hole to ball hole.
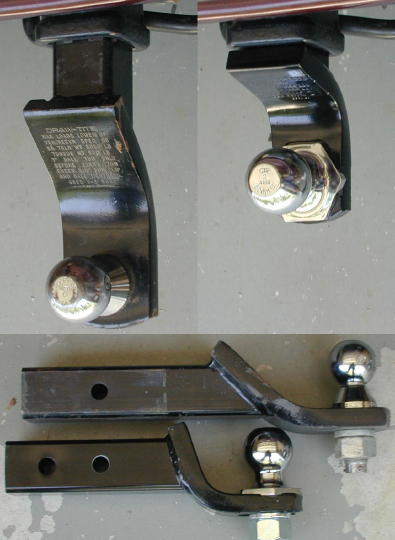
Comparisons between my old ball mount and my modified extra short ball mount.
Although our rig appeared to perform just fine on its own, I decided to add a friction sway bar for a bit of added insurance. First I had a sway bar ball tab welded to my ball mount. Then I installed an inexpensive friction sway bar. I can't say I notice any difference in handling, but it can't hurt.

Sway bar ball installed on the ball mount.

Friction sway bar.
We most always tow our RV with the Trailblazer (which has far more room for pets). But occasionally we'll use our Dodge Ram.

In the spring of 2011 we bought a 2009 Silverado 2500HD in anticipation of getting a new larger RV. The old Fun Finder is not much of a challenge for this truck.
