
TXT-1 Mods: Part 2
Jeffrey Zweizig Jeff Zweizig Jeffrey Zweizig Jeff Zweizig
|
Update, Summer 2004: Jeff's TXT-1 versus West Virginia (again) It was time again for me and my TXT-1 to hit the mountains of West Virginia. But first I had some things I wanted to do before the trip. 
1) I decided to replace both front and rear standard steering servos with 1/4 scale servos. The 1/4 scale servos are more powerful, faster and less expensive then their standard sized counterparts. Their only disadvantage is that they're big. But the TXT-1 was designed to accept 1/4 servos, so it's no disadvantage at all.
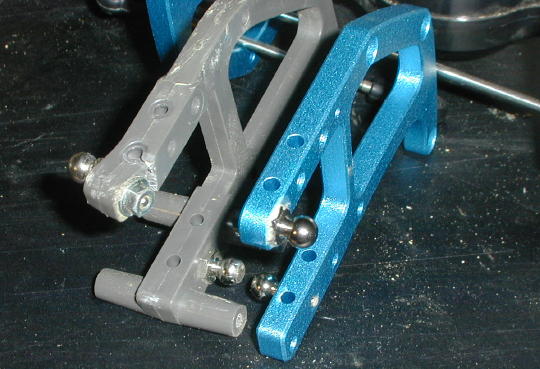
I broke one of the stock axle guards last year. While I was replacing the steering servos I decided to replace all four axle guards with the optional Tamiya aluminum Axle Guards. Here's a side-by-side comparison. 
Unlike the plastic stock axle guards, a pair of the optional aluminum axle guards have a right and a left. Pay attention to which is which during assembly. 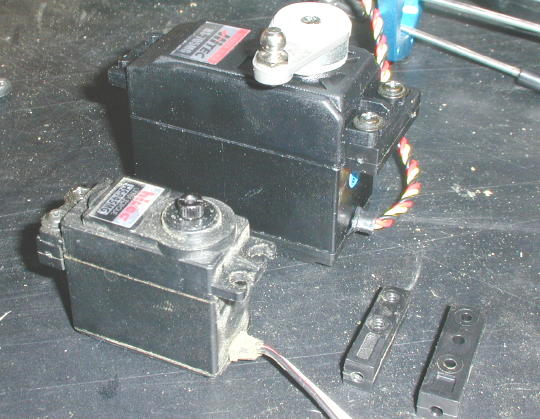
Comparing a standard servo to a new 1/4 scale servo. It's a Hitec HS-705MGS servo. Note the mounting blocks in the lower right corner. The small block is part F6. The large block is part F7. Both parts are found on the same F parts tree. Although 1/4 servos are not mentioned in the TXT-1 assembly instructions, installing the servos is as simple as following the instructions, but replacing all the F6 parts with F7 parts. 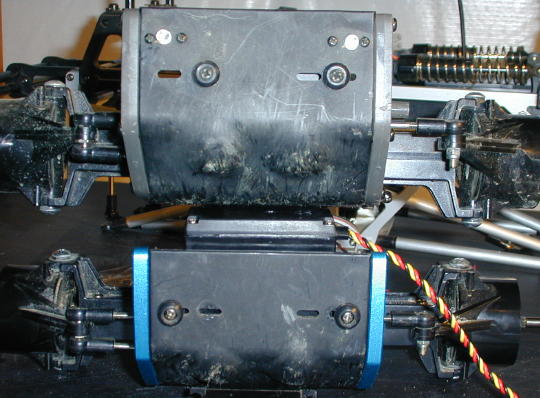
This pic shows how the 1/4 scale servo and F7 blocks (bottom axle) use different mounting holes. 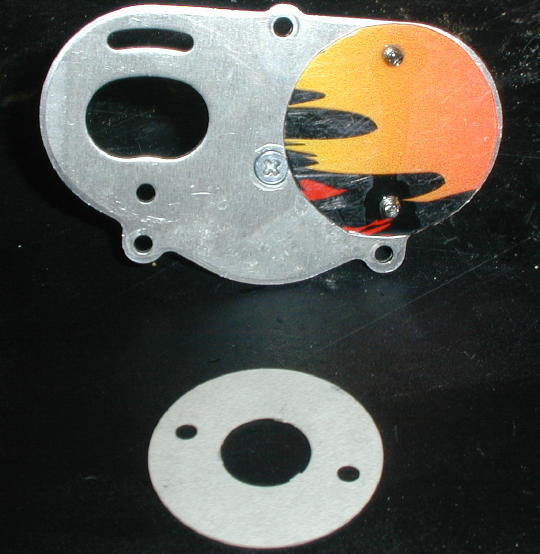
I removed one of the two motors and fabricated a cover plate out of a piece of lexon from a broken E-Maxx body. There are cardboard spacers between the motors and the motor plate. I used one of the spacers as a template for the cover. I threaded the motor mount screws into the lexon and hit the threads with a few drops of Super Glue. While disassembling the transmission I learned that I used FAR to much Loctite when I constructed the truck. Some screws required vice-grips. 
Next I installed a Robinson Racing 9-tooth pinion on the remaining motor. I filed down the inside tooth points of the spur gear to clear the grub screw on the pinion. The idea for the 1-motor, 9-tooth pinion setup came from a write-up I read at RCCrawler.com. 
Here's the motor and transmission back together. I reversed the polarity of the motor wires from the Super Rooster ESC so the motor would run backwards. The front of the truck is now the back. 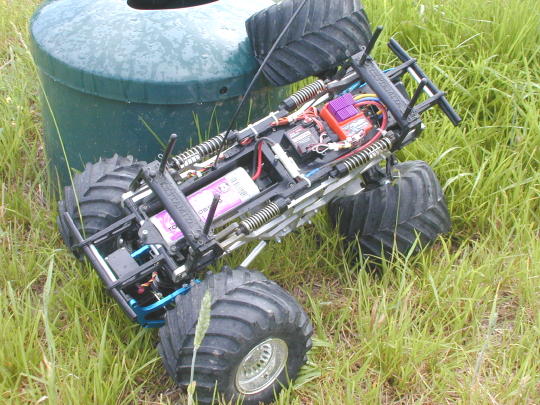
Since the front of the truck is now the back and the back is the front, the right side tires are now mounted on the left and the left side tires are mounted on the right. 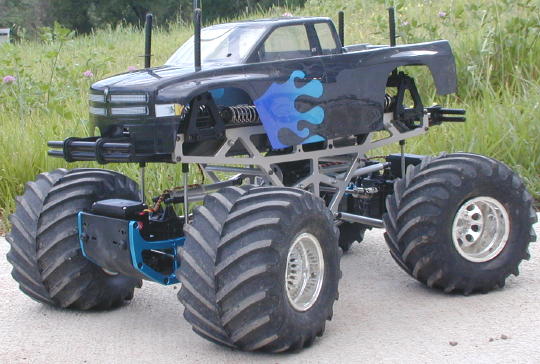
The final step is to flip the body front to back and drill a new antenna hole accordingly.
TXT-1 Silly Mods |